
Set up your company, branches and departments
Plan: All plans
Before you add staff, tell Staff Khata about your company. Your profile, employee code format, branches and departments are used on every report, payslip and punch.
Fill in your company profile
Your logo, name and tax number print on reports and payslips, so set them first.
- Click Organization → Company. The Company Settings page opens on the Company Profile tab.
- At the top, Organization Info shows your Corporate ID and Workspace URL. You cannot change these.
- Under Company Logo, click Upload Logo and pick a square PNG, JPG or GIF under 2 MB (200 × 200 px works well).
- Check Company Name, then enter your Official Tax / Registration No., such as your GST number.
- Add your Company Website. Start it with
https://. - Scroll to Company Address. Put the street, city, state and postal code in their own fields, so they print correctly on documents.
- Click Save Changes.
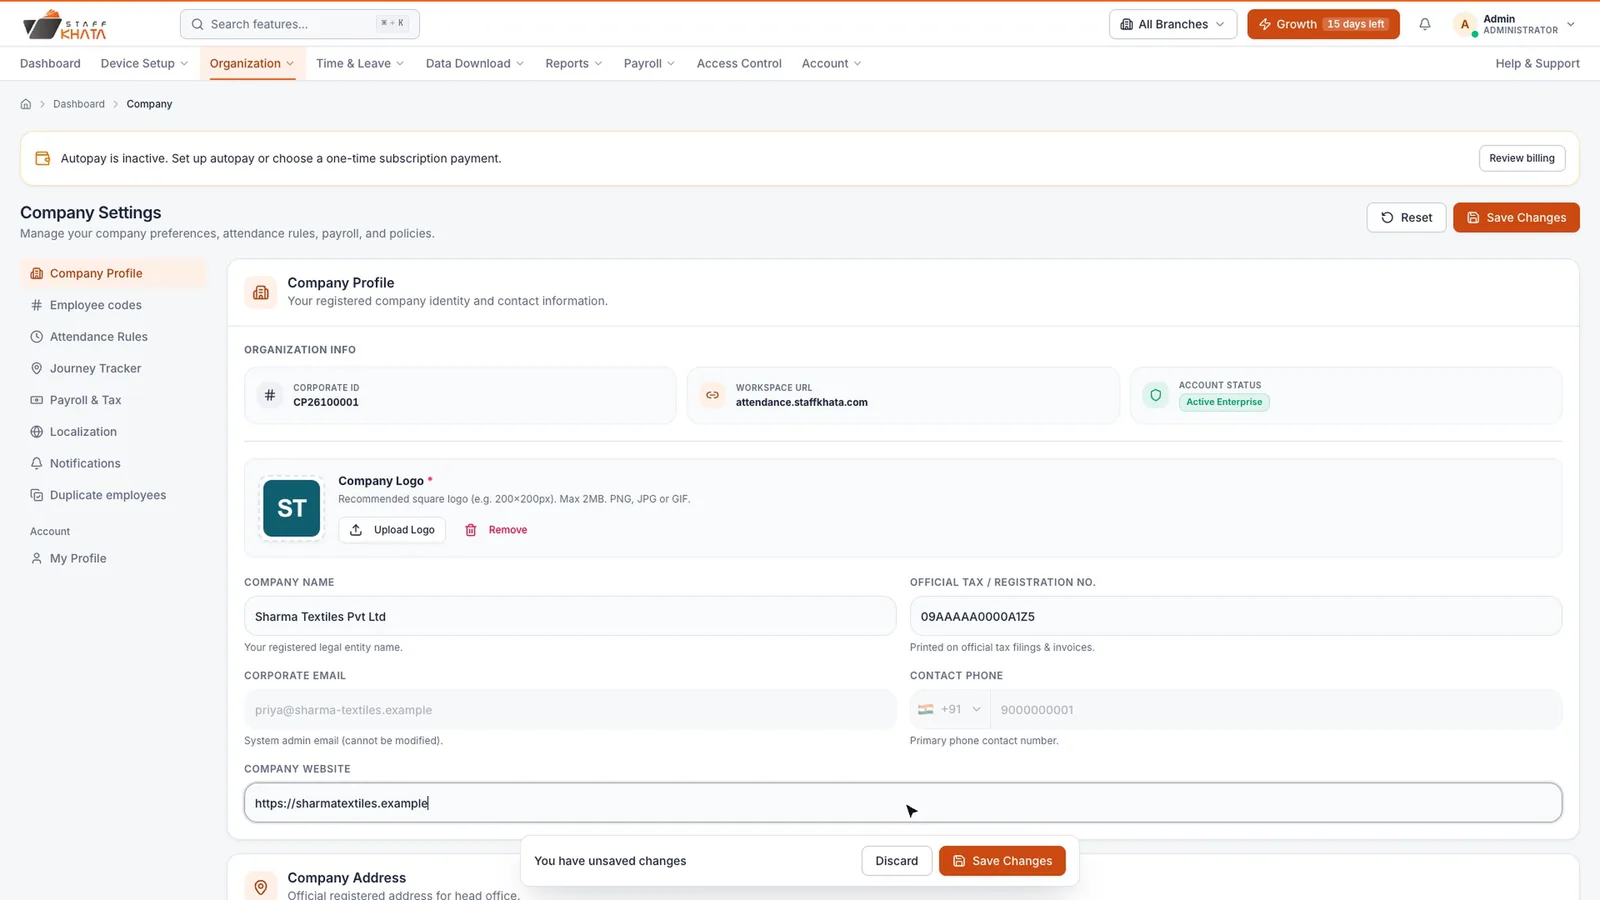
Note: Corporate Email is your admin login email and cannot be changed here.
Choose your employee code format
Staff Khata gives every new employee a code automatically. Pick a format that is short and easy to read.
- In Company Settings, open the Employee codes tab.
- Set the fields below. The Live Generated Code Preview box updates as you type.
- Click Save Changes.
| Setting | What it does |
|---|---|
| Prefix | Letters at the start, such as ST or EMP. |
| Separator / Delimiter | Hyphen, slash, underscore, dot, or none. |
| Include Year | Adds the year (2026 or 26), or None. |
| Number of Digits | How many digits the number has, from 2 to 6. |
| Starting / Next Number | The number the next new employee gets. |
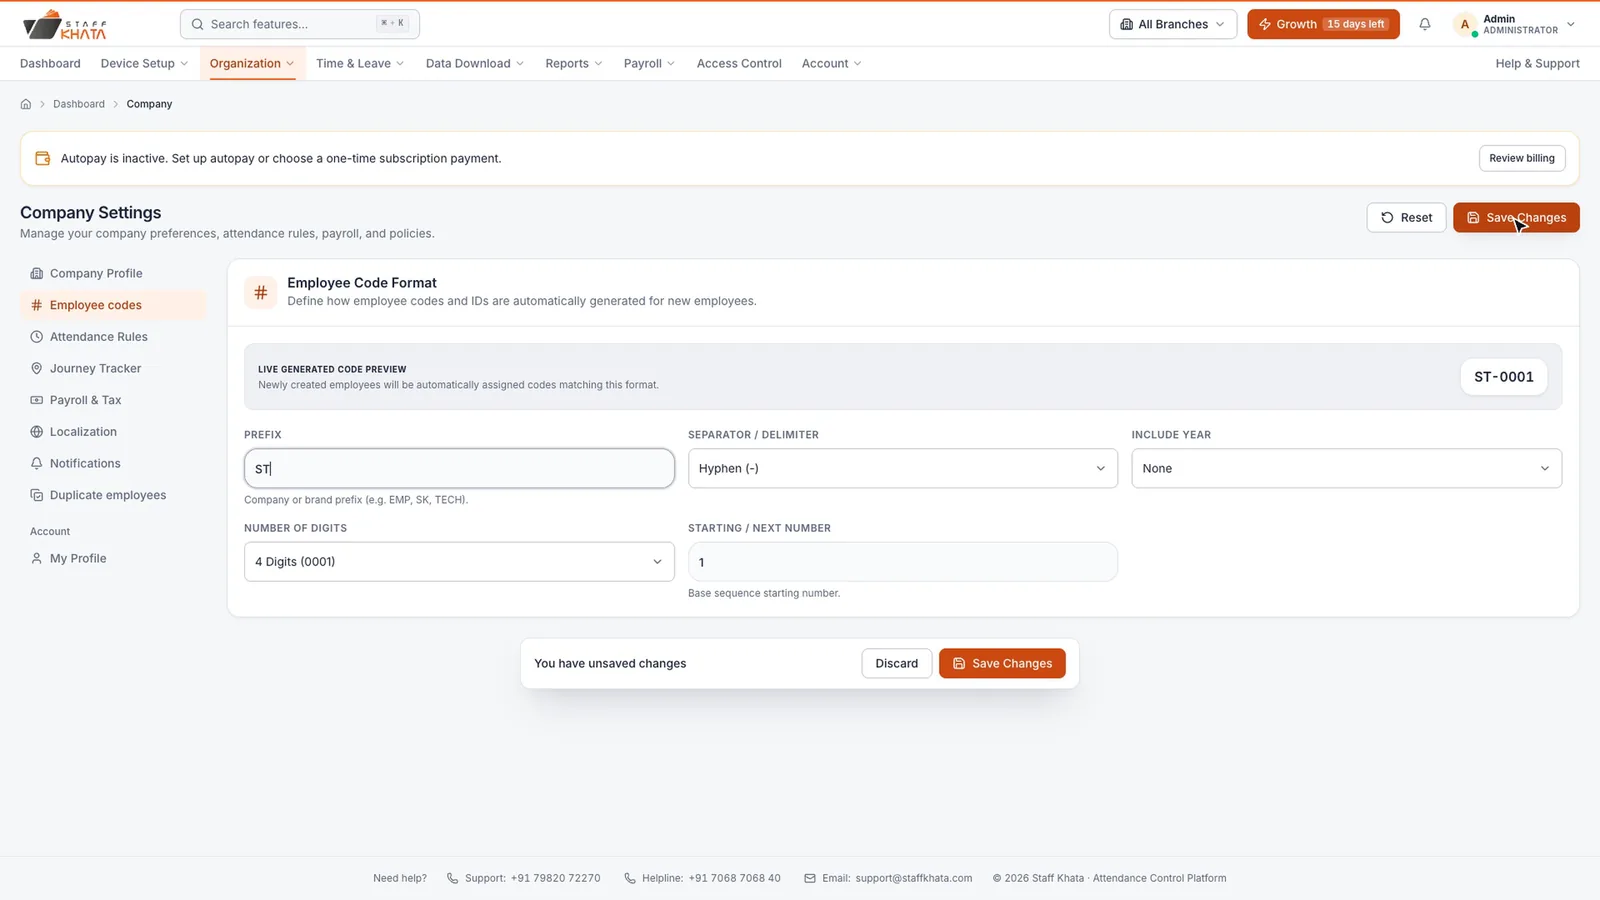
Tip: Codes are only generated for new employees. Existing codes stay as they are.
Check localization
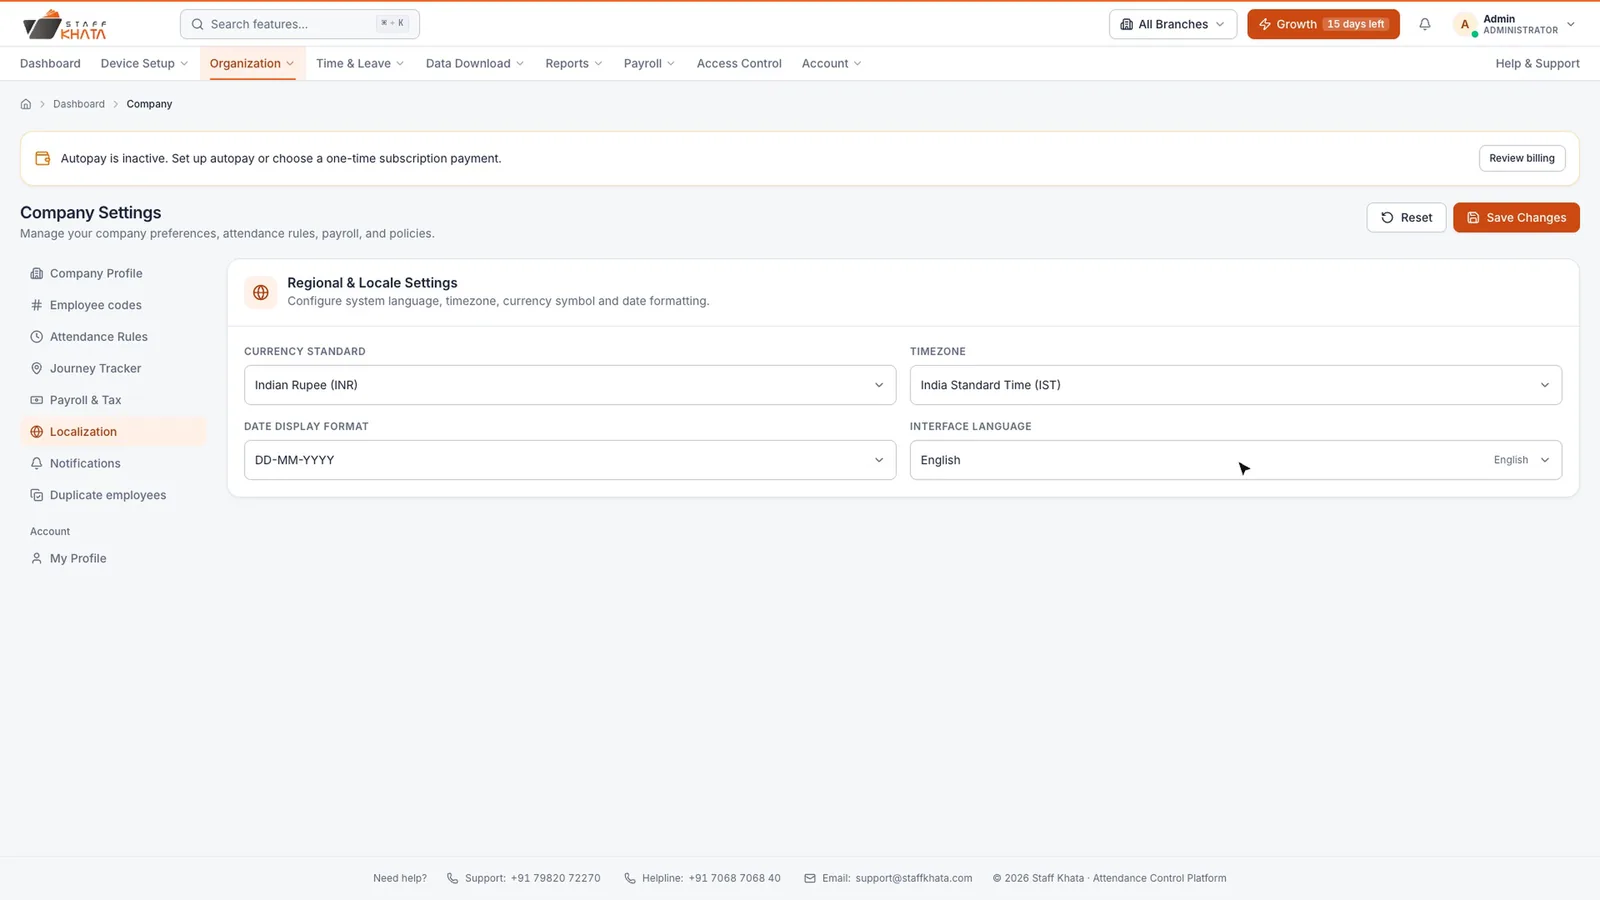
Open the Localization tab. Currency Standard, Timezone, Date Display Format and Interface Language are set for India when you sign up. Change them only if your business works differently, then click Save Changes.
Payroll & Tax tab
The Payroll & Tax tab holds your salary cycle (start and end day), PF, ESI and gratuity settings, and your financial year. These are explained in Payroll and salaries.
Add your branches
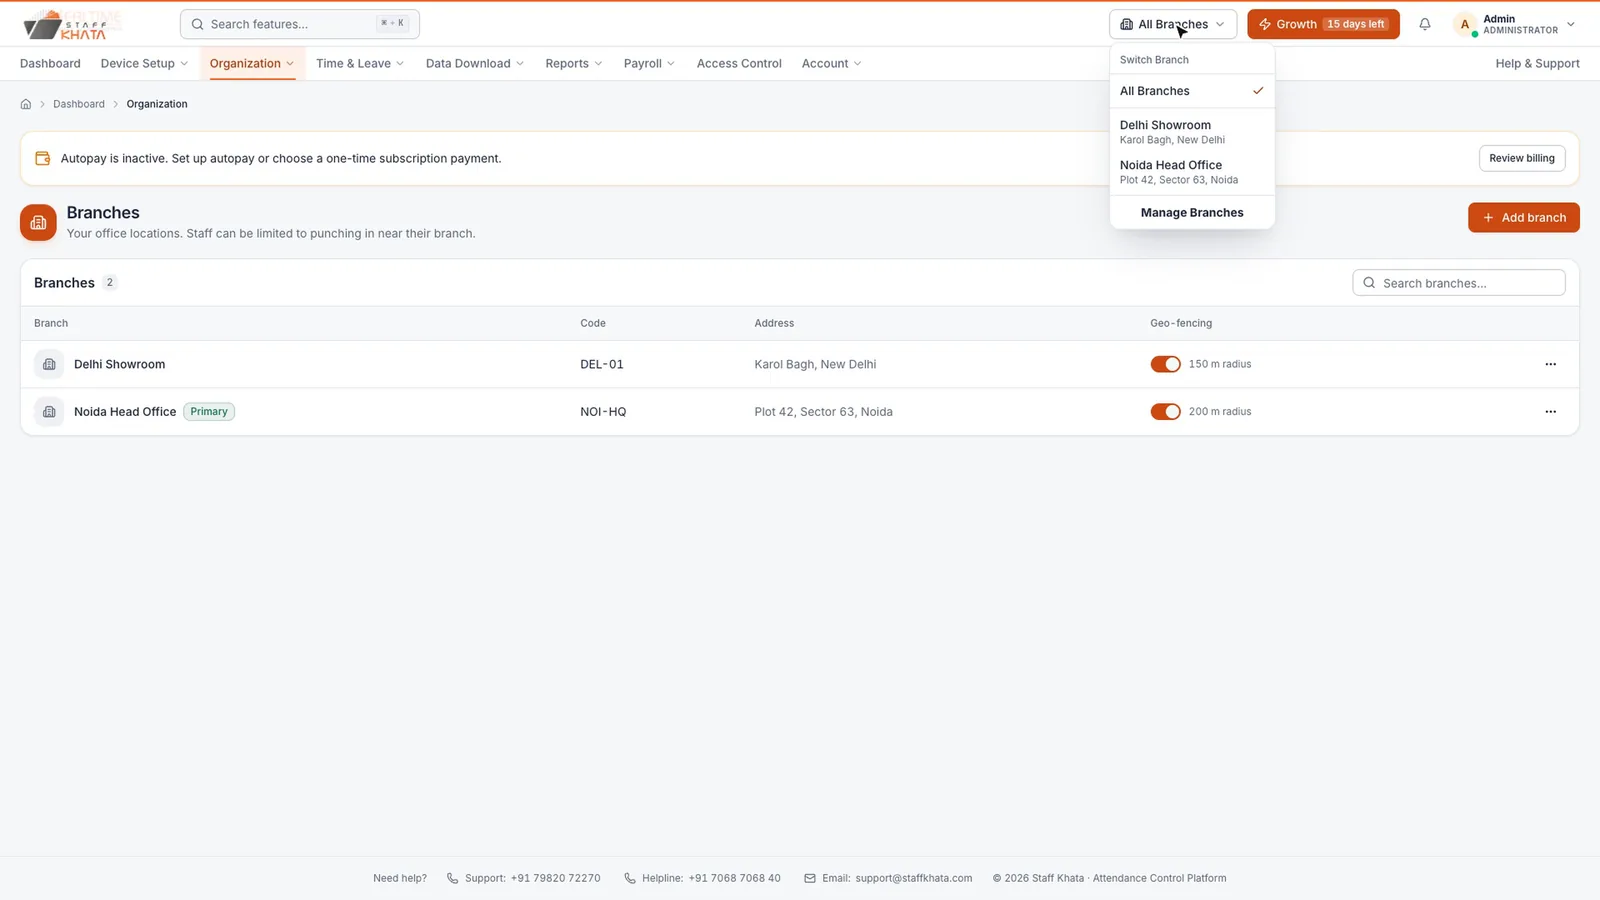
Branches are your office or factory locations. Each branch can have its own geo-fence, so staff can only punch in near the place they work.
- Click Organization → Branch. Your workspace already has a Main Branch.
- Open the row menu (⋯) and click Edit.
- Enter a clear Branch name, a short Code (for example
NOI-HQ) and the Address. - Turn on Primary branch if new staff should be added here by default.
- Turn on Geo-fencing. Then set the location: click Locate me, type the Latitude and Longitude, or click the map to drop a pin.
- Enter the Radius (m): how far from the pin staff can be and still punch in.
- Click Save Changes.
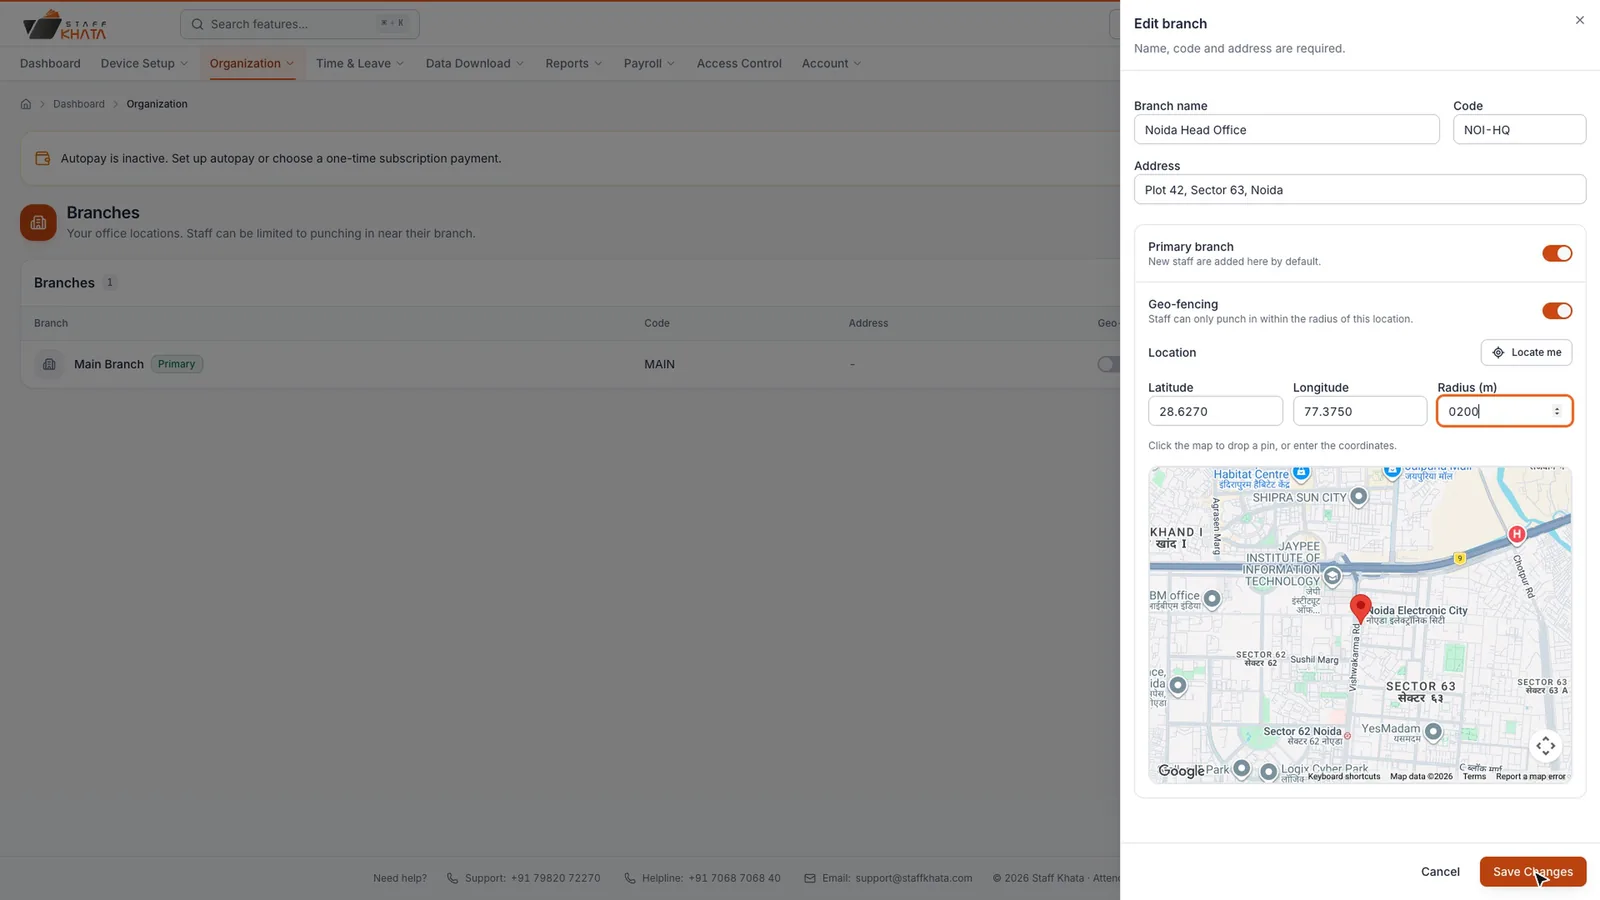
To add another location, click Add branch, fill in the same fields and click Add branch.
Tip: Use a radius of at least 50 metres. Phone GPS is less accurate indoors, and a very small radius can stop staff from punching in at their own desk.
All branches appear in the list with their geo-fence radius. Use the branch switcher in the top bar (All Branches) to see one branch at a time or all together.
Geo-fencing also has to be switched on for the company. See Attendance rules and office time policy.
Add departments and designations
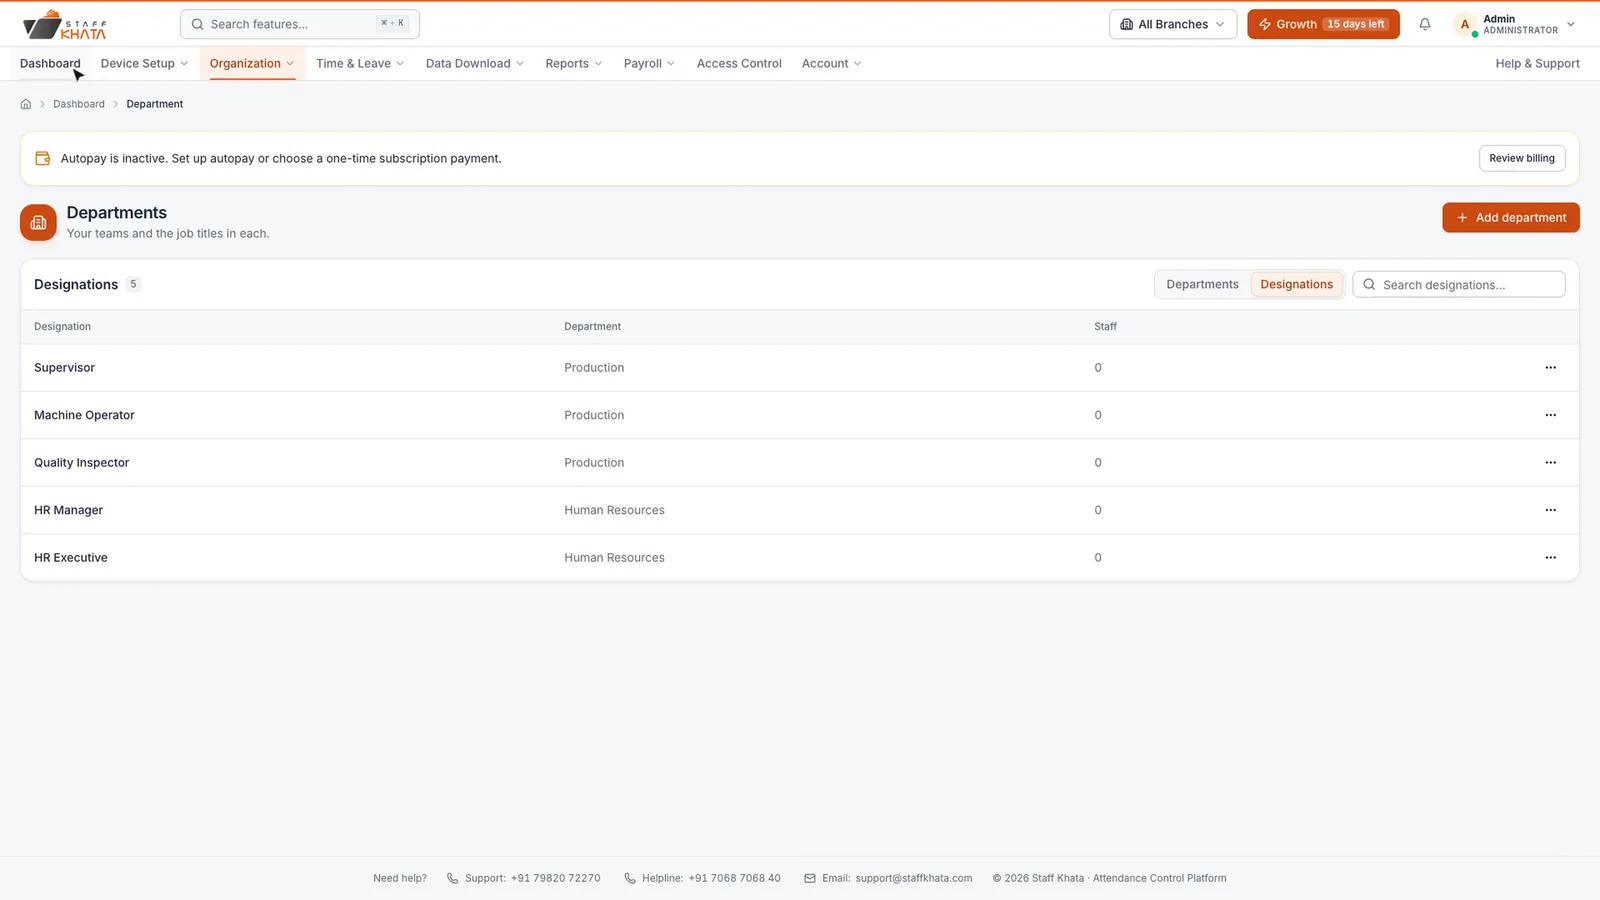
Departments are your teams. Designations are the job titles inside each team, and they appear on payslips and profiles.
- Click Organization → Department. Two departments are created for you.
- To add job titles to one, open its row menu (⋯) and click Edit. Under Designations, type a title, click Add designation for the next one, then click Save Changes.
- To create a new team, click Add department, enter the Department name, add its designations and save.
- Switch the table from Departments to Designations to see every job title in your company and which department it belongs to.
Next, set your attendance rules and office time policy.
Still stuck? Raise a ticket from Help & Support inside the app, or contact us at staffkhata.com/contact.