
Journey Tracker (add-on)
Plan: Journey Tracker add-on
Journey Tracker is for staff who work on the road: sales visits, deliveries, service calls. Employees record their trips on the Staff Khata mobile app, and you see where they are, where they stopped and what they spent, from the web app.
Plan needed: Journey Tracker is a paid add-on. The Journey Tracker menu and settings tab appear only once the add-on is active on your account. See Billing & Plan for current prices.
Turn on Journey Tracker
Set how often phones send their location before your team starts using it.
- Click Organization → Company.
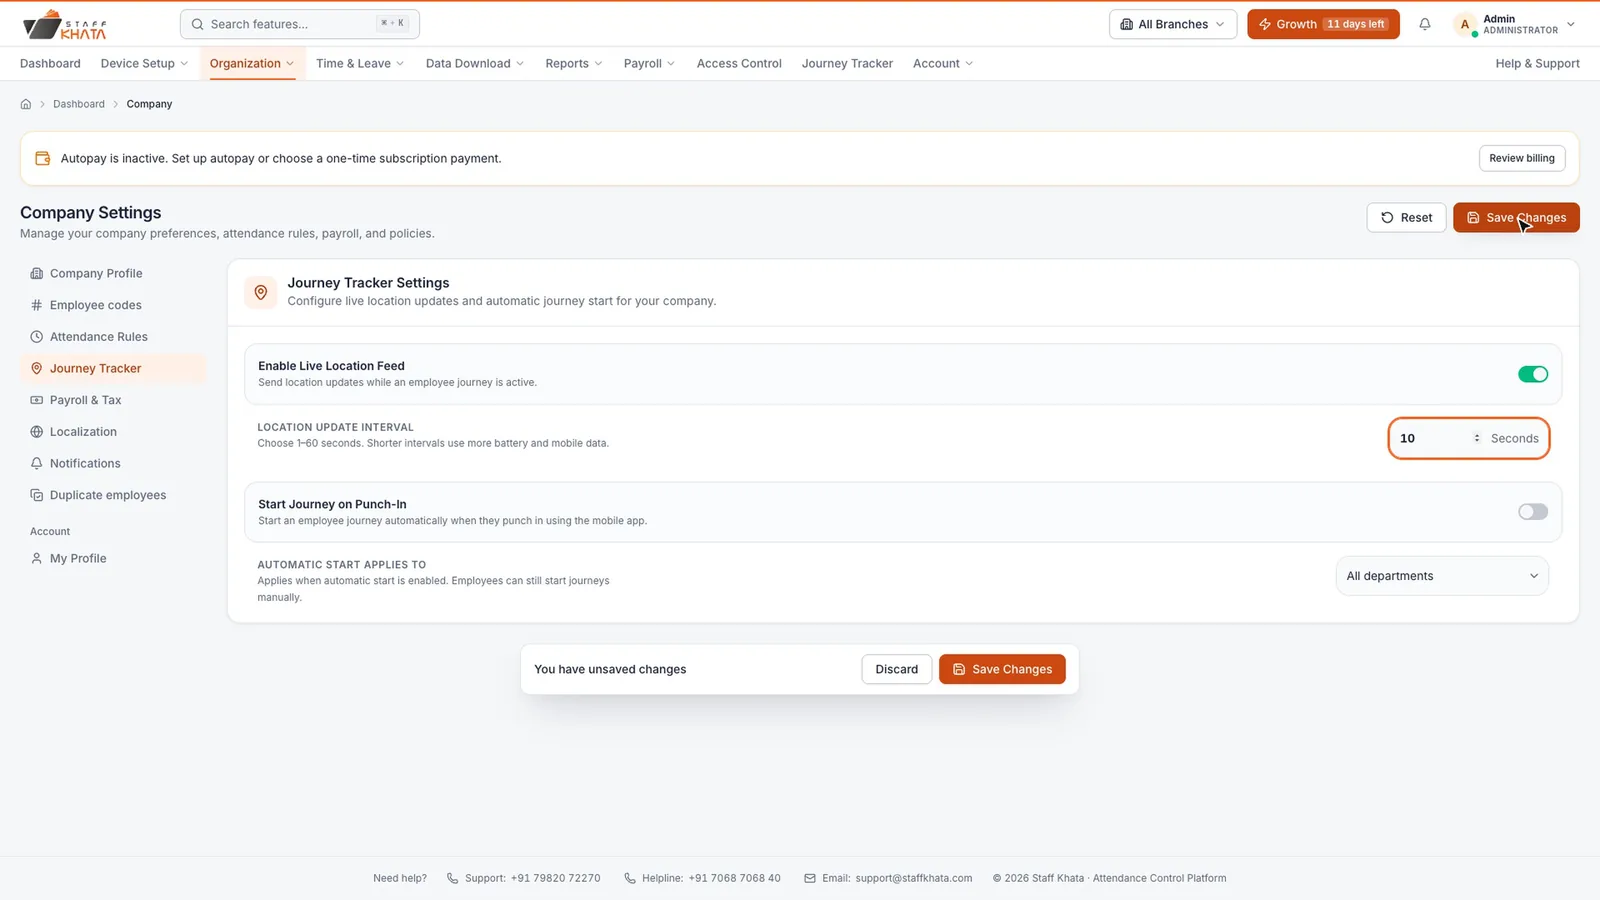
- In Company Settings, open the Journey Tracker tab.
- Switch on Enable Live Location Feed.
- Enter the Location Update Interval in seconds. Ten seconds works well for most teams.
- Click Save Changes. You will see "Journey settings saved".
| Setting | What it does |
|---|---|
| Enable Live Location Feed | Sends location updates while an employee's journey is running. |
| Location Update Interval | How often the phone sends its location, from 1 to 60 seconds. Shorter intervals use more battery and mobile data. |
| Start Journey on Punch-In | Starts a journey automatically when the employee punches in on the mobile app. |
| Automatic Start Applies To | All departments, or Selected departments only. Employees can still start journeys by hand. |
Start a journey (employee, mobile app)
- On the Home screen of the Staff Khata app, tap Journeys. You can also go to More → Journey Tracker.
- Tap Start Journey, then Done on the confirmation.
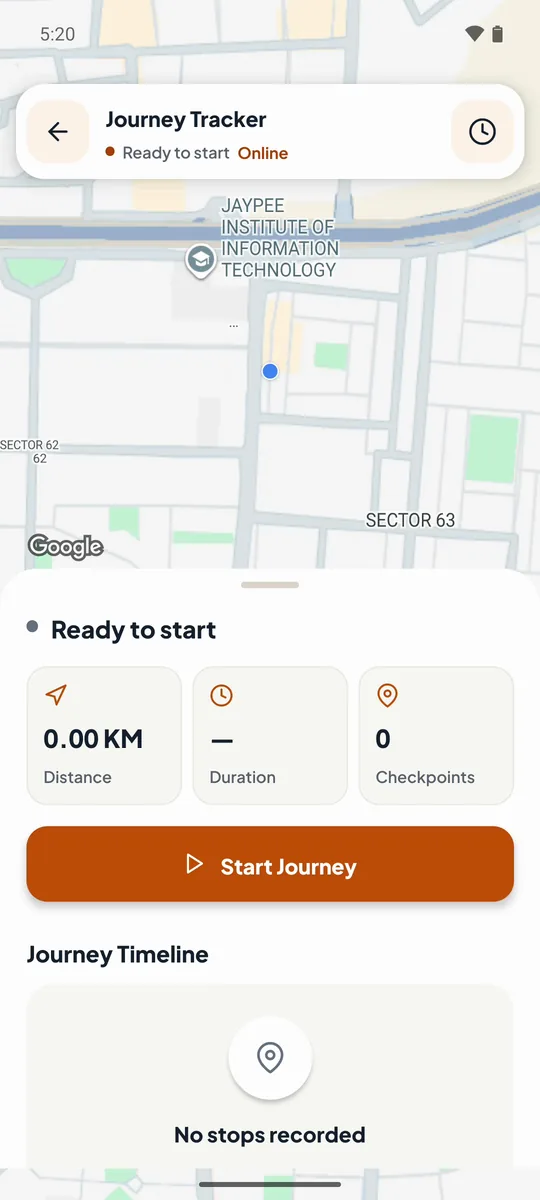
The screen now shows On Trip with the distance, duration and checkpoints so far. The phone keeps sending its location while the app is in the background.
Tip: If the app warns "Battery optimization is on — tracking may stop", tap Fix and allow it. Some phones stop background apps to save battery, which leaves gaps in the route.
Add a checkpoint at a customer
A checkpoint records a stop: where it was, what happened and any bills.
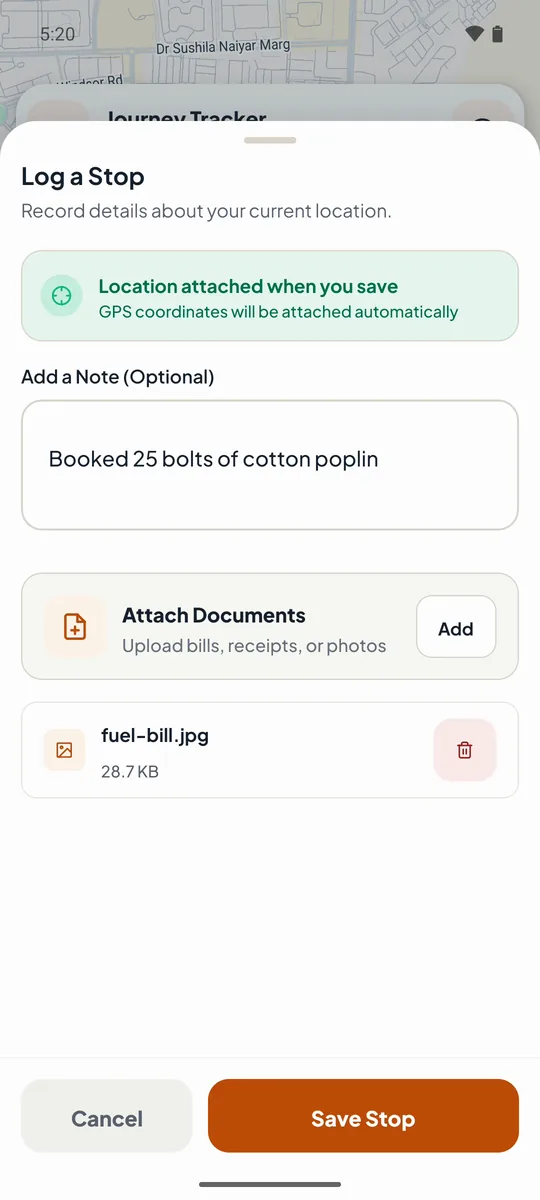
- On the trip screen, tap Add Checkpoint. The Log a Stop sheet opens. Your location is attached automatically.
- Under Add a Note (Optional), write what happened, for example the order you booked.
- Tap Attach Documents to add bills, receipts or photos. Choose Take Photo or Browse Files.
- Tap Save Stop.
End the journey
- When the work is done, tap End Trip.
- Confirm with End trip. You can't resume a journey after ending it.
The journey closes with its route, total distance and every stop. Employees can see past trips under More → Journey History.
Watch your team live (admin)
- Click Journey Tracker in the top menu.
- Click Refresh. Everyone on a trip appears under Live now.
- In the Journeys List, click the map icon on an active journey to open its live map. The map follows the employee as new locations arrive, with an Activity Timeline on the left.
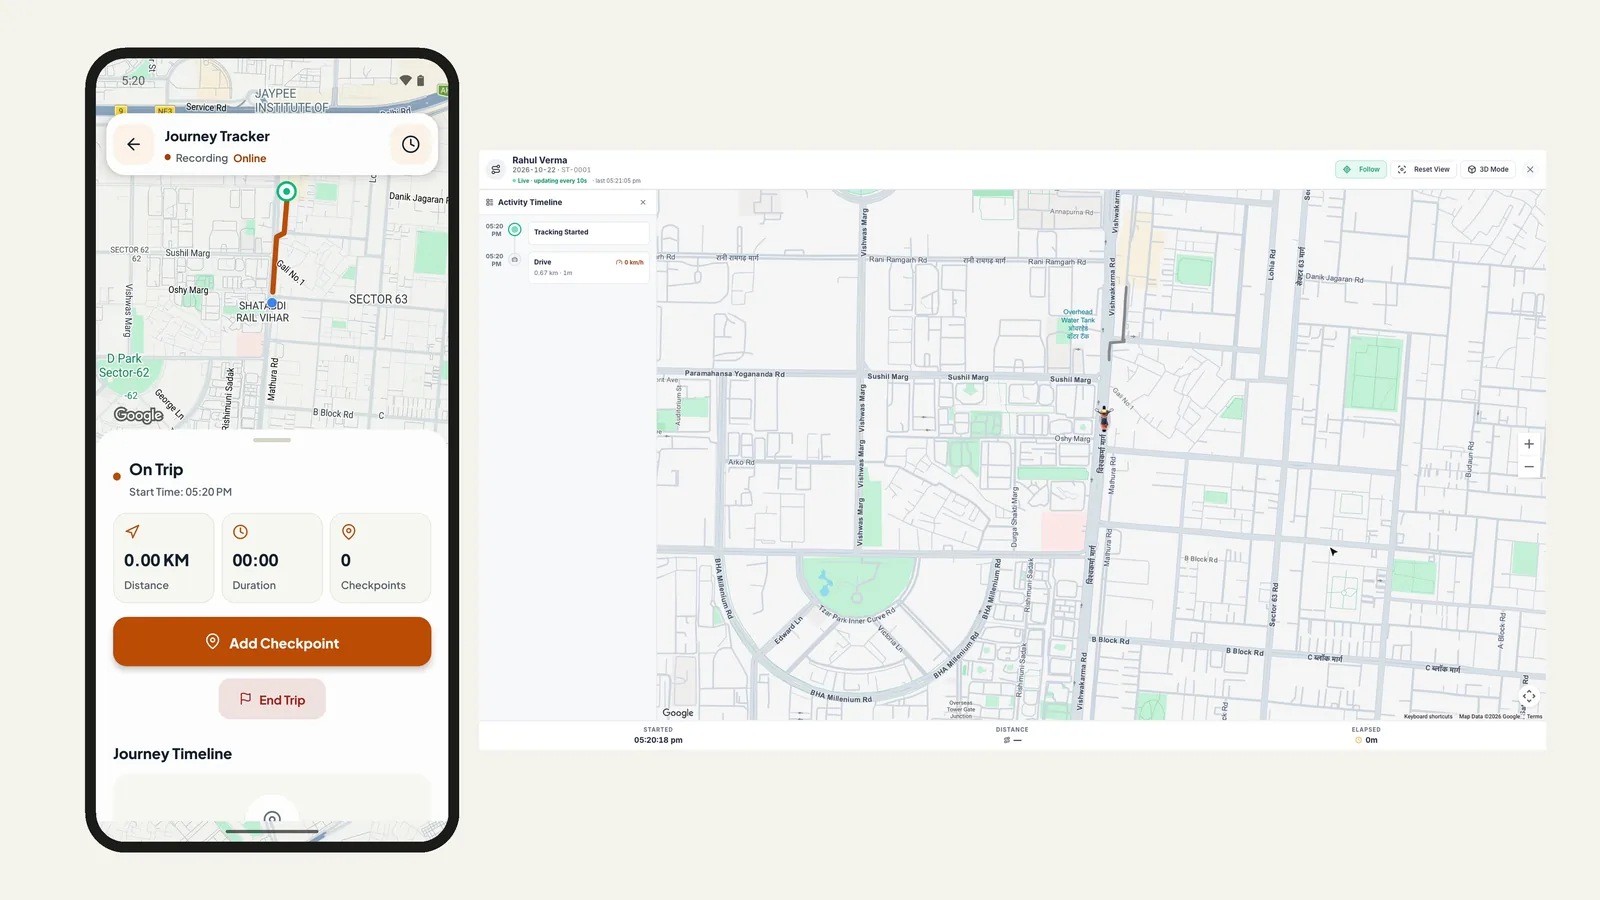
To see everyone at once, click Live Locations at the top right. It shows every employee on a trip on one map.
Review journey history
- Under Filters, pick Today, Yesterday, Last 7 days or This month, or set your own From and To dates. You can also pick one employee.
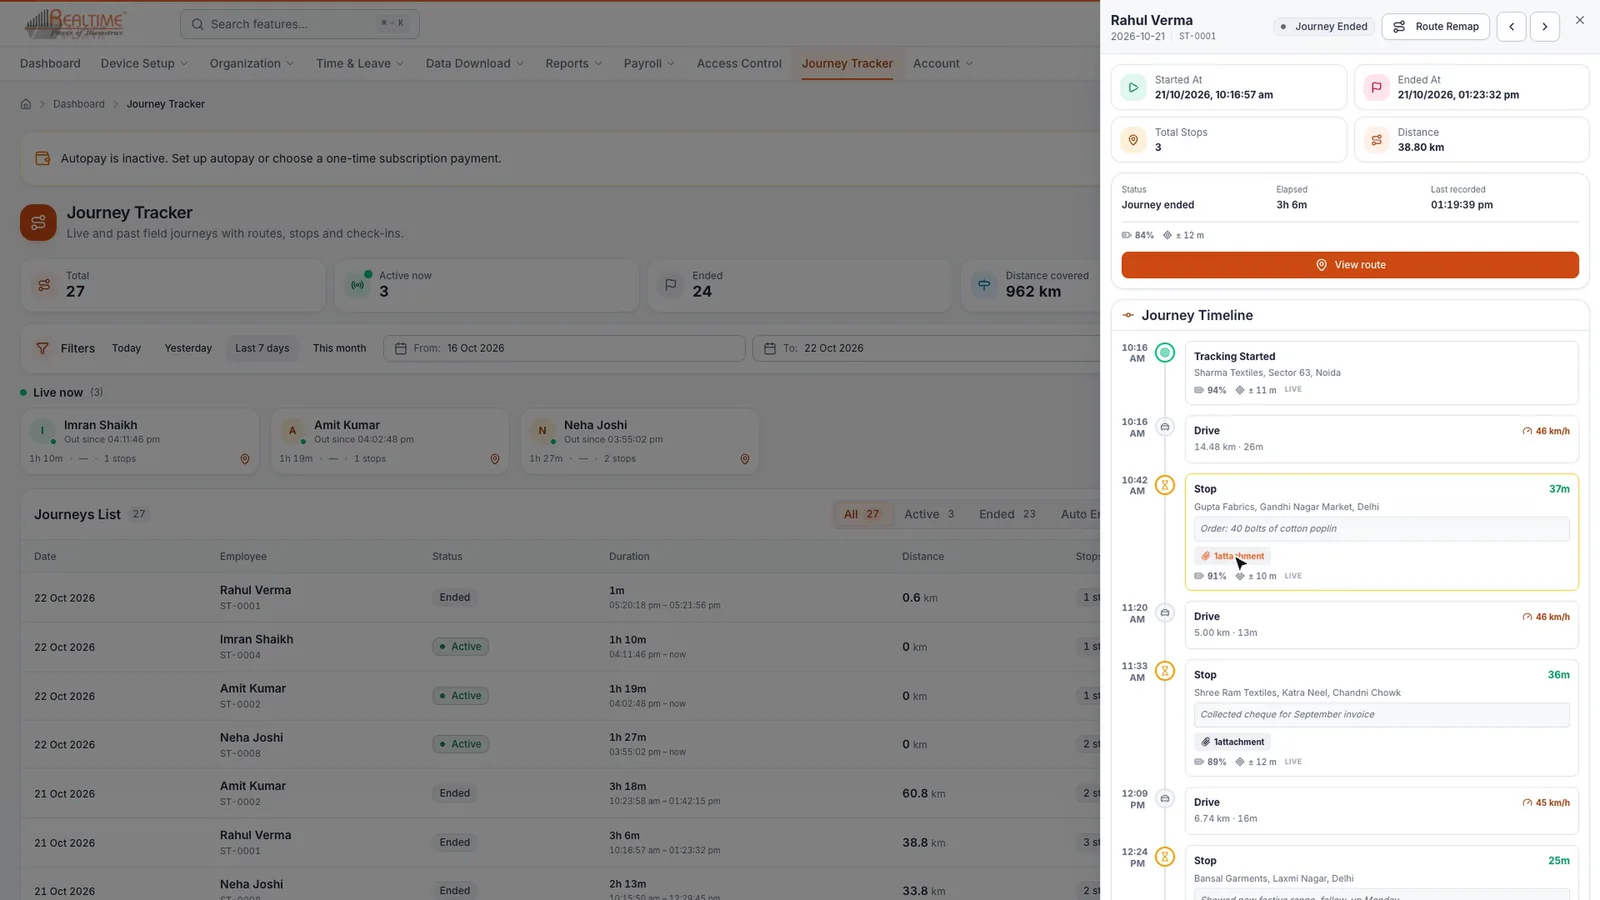
- The cards at the top show Total journeys, Active now, Ended, Distance covered and Avg. duration.
- Use the All, Active, Ended and Auto Ended tabs to filter the list, and Export to download it.
- Click the eye icon on any journey. The panel shows start and end time, total stops, distance and the Journey Timeline: every drive and every stop with how long it lasted. Checkpoints show the employee's note, and you can click attachment to open the bills.
Replay a route
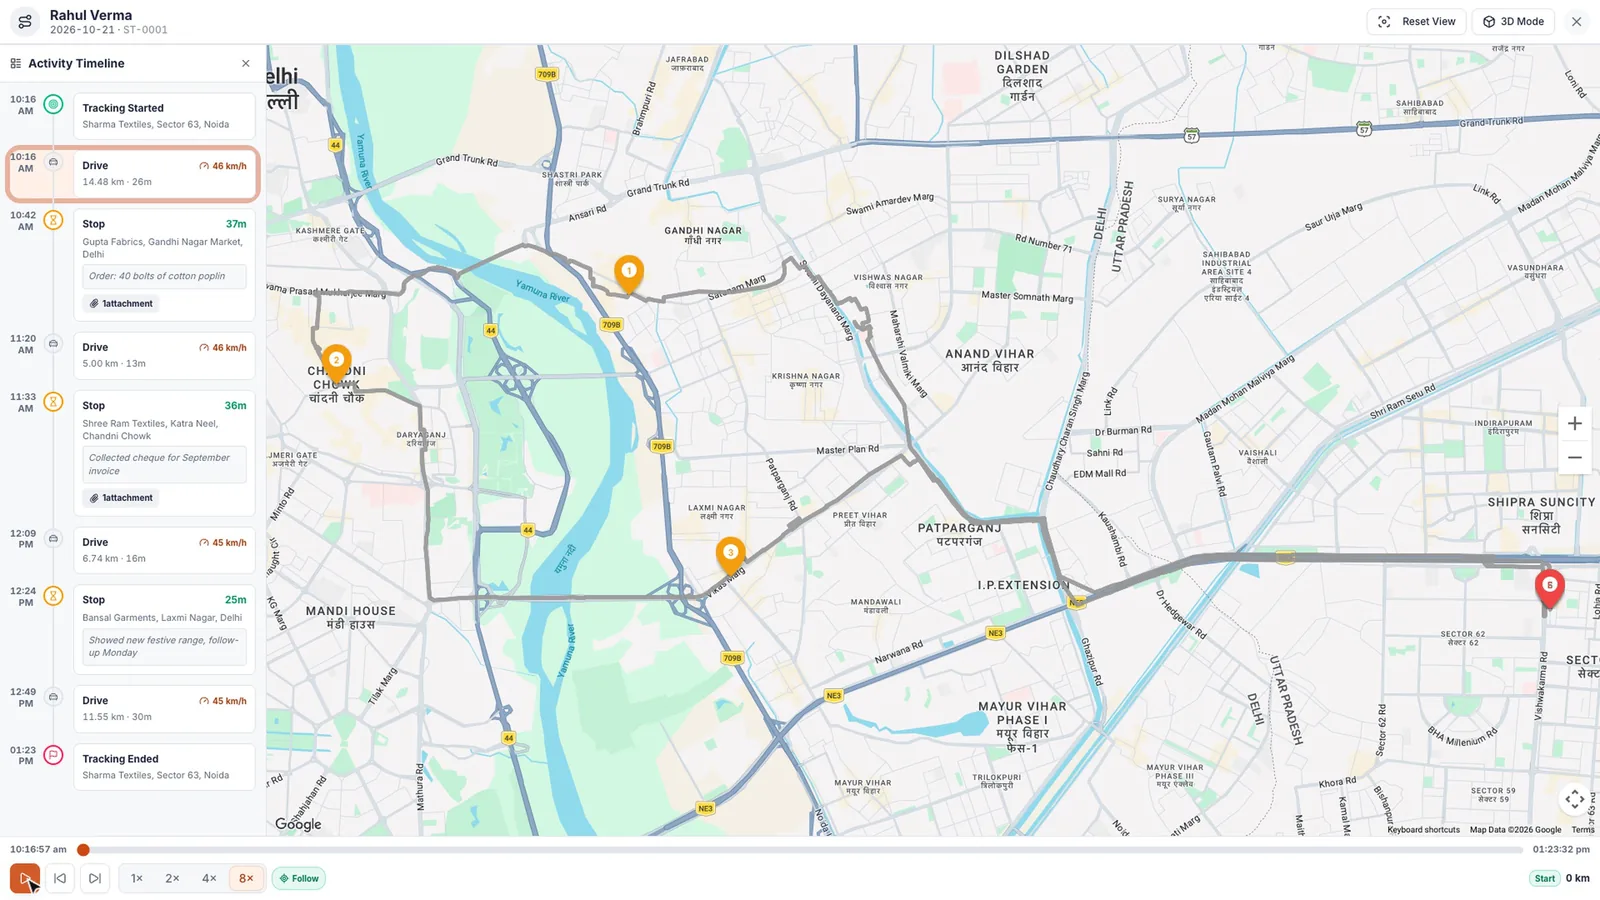
- In the journey panel, click View route. The whole trip is drawn on the map with each stop numbered.
- Press play to replay the day. Choose 1×, 2×, 4× or 8× speed.
- Click 3D Mode for a closer look at the streets, and Satellite for the satellite view. Reset View brings the map back.
Note: If someone forgets to end a trip, you can end it from the journey panel. Journeys left running may also close on their own and show as Auto Ended.
Still stuck? Raise a ticket from Help & Support inside the app, or contact us at staffkhata.com/contact.