
Add and manage employees
Plan: All plans
There are three ways to add employees: one at a time with the Add Employee form, many at once from an Excel file, or by sending an invite so they fill in their own details.
Open the employee list
Click Organization → Employee List. The Employee Directory shows everyone with their code, department, contact details and status. Use Add Employee, or the arrow next to it (More ways to add), for the other two ways.
Add one employee
The Add employee form has four steps. Fields marked with a star are required; you can fill in the rest later.
Step 1: Personal Info
- Enter First Name, Last Name and Work Email.
- Enter the Contact Number with country code. It cannot be changed after the employee is added.
- Set a first Password. The employee can change it after signing in.
- Choose Gender, then click Next.
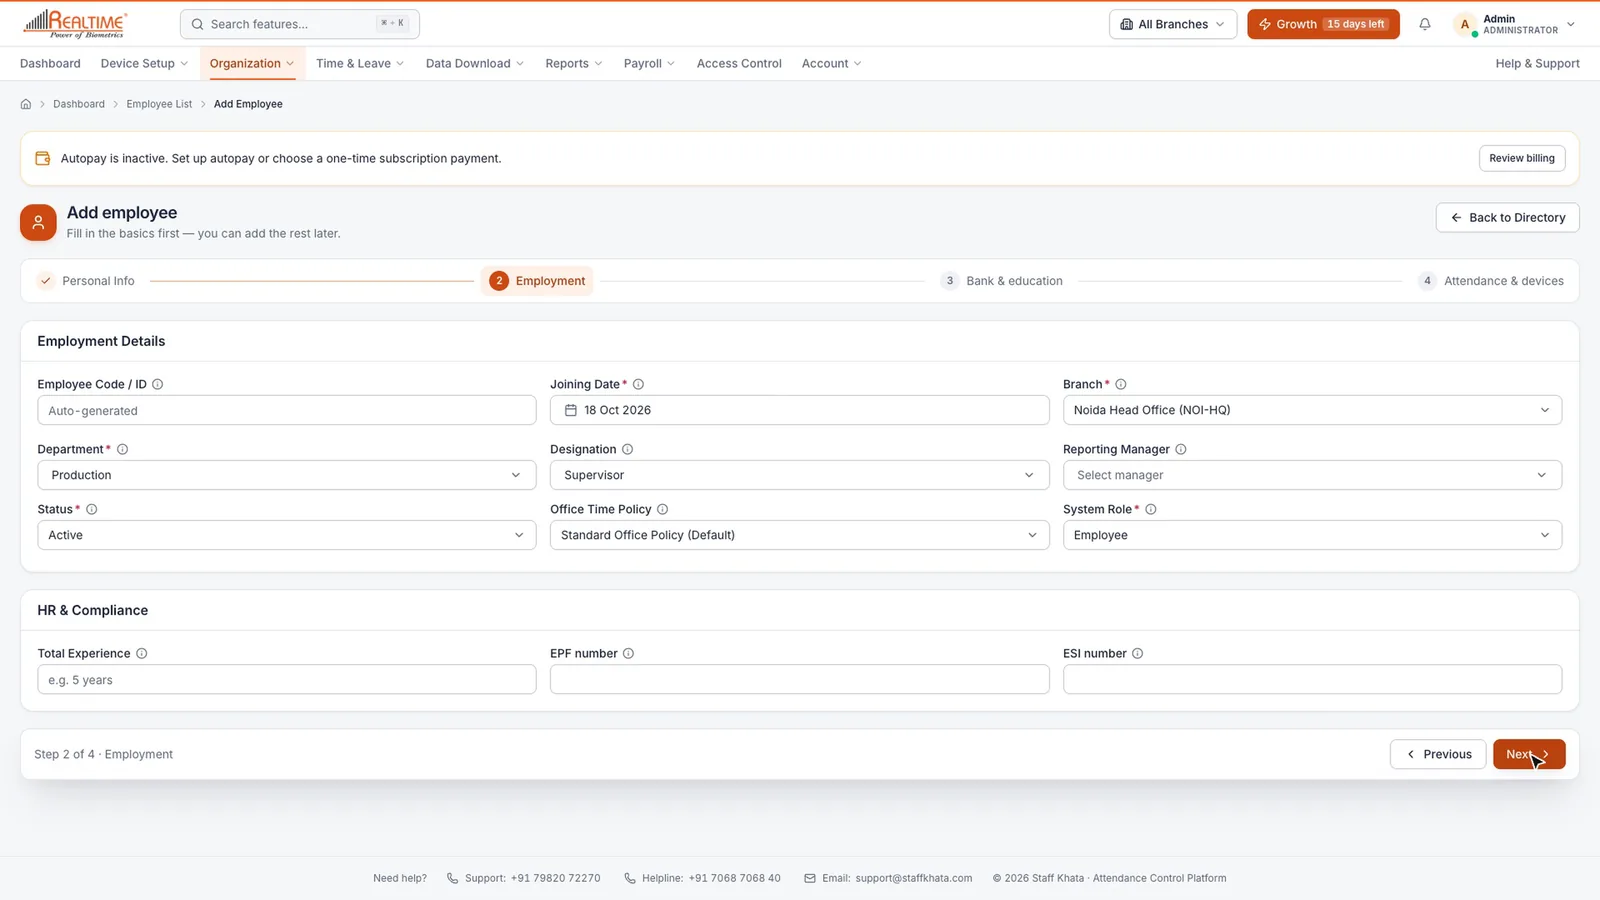
Step 2: Employment
- Leave Employee Code / ID blank to create a code from your company format. See Set up your company.
- Check the Joining Date, then choose Branch, Department and Designation.
- Choose the System Role. Most staff are Employee; they see only their own data.
- Office Time Policy uses your default policy unless you pick another.
- Reporting Manager, EPF number and ESI number are optional. Click Next.
Step 3: Bank & education
Bank details are used for salary payouts. Both sections are optional. Click Next.
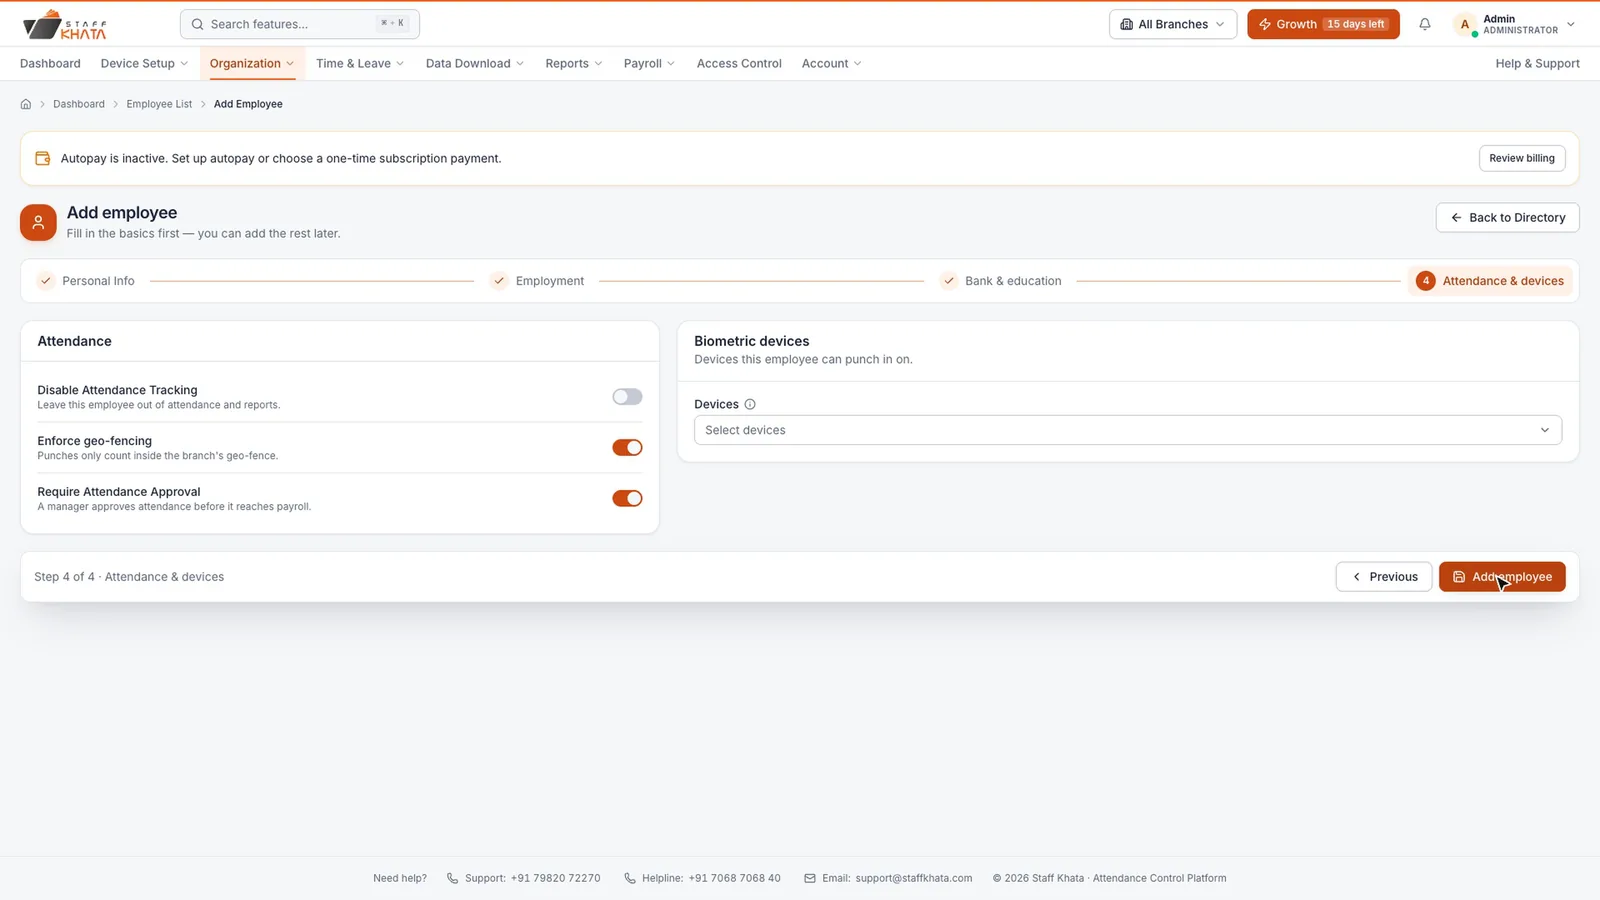
Step 4: Attendance & devices
| Setting | What it does |
|---|---|
| Disable Attendance Tracking | Leaves this employee out of attendance and reports. |
| Enforce geo-fencing | Punches only count inside their branch's geo-fence. |
| Require Attendance Approval | A manager approves attendance before it reaches payroll. |
| Devices | The biometric devices this employee can punch in on. |
Click Add employee. The new employee appears in the list with their own code.
Import employees from Excel
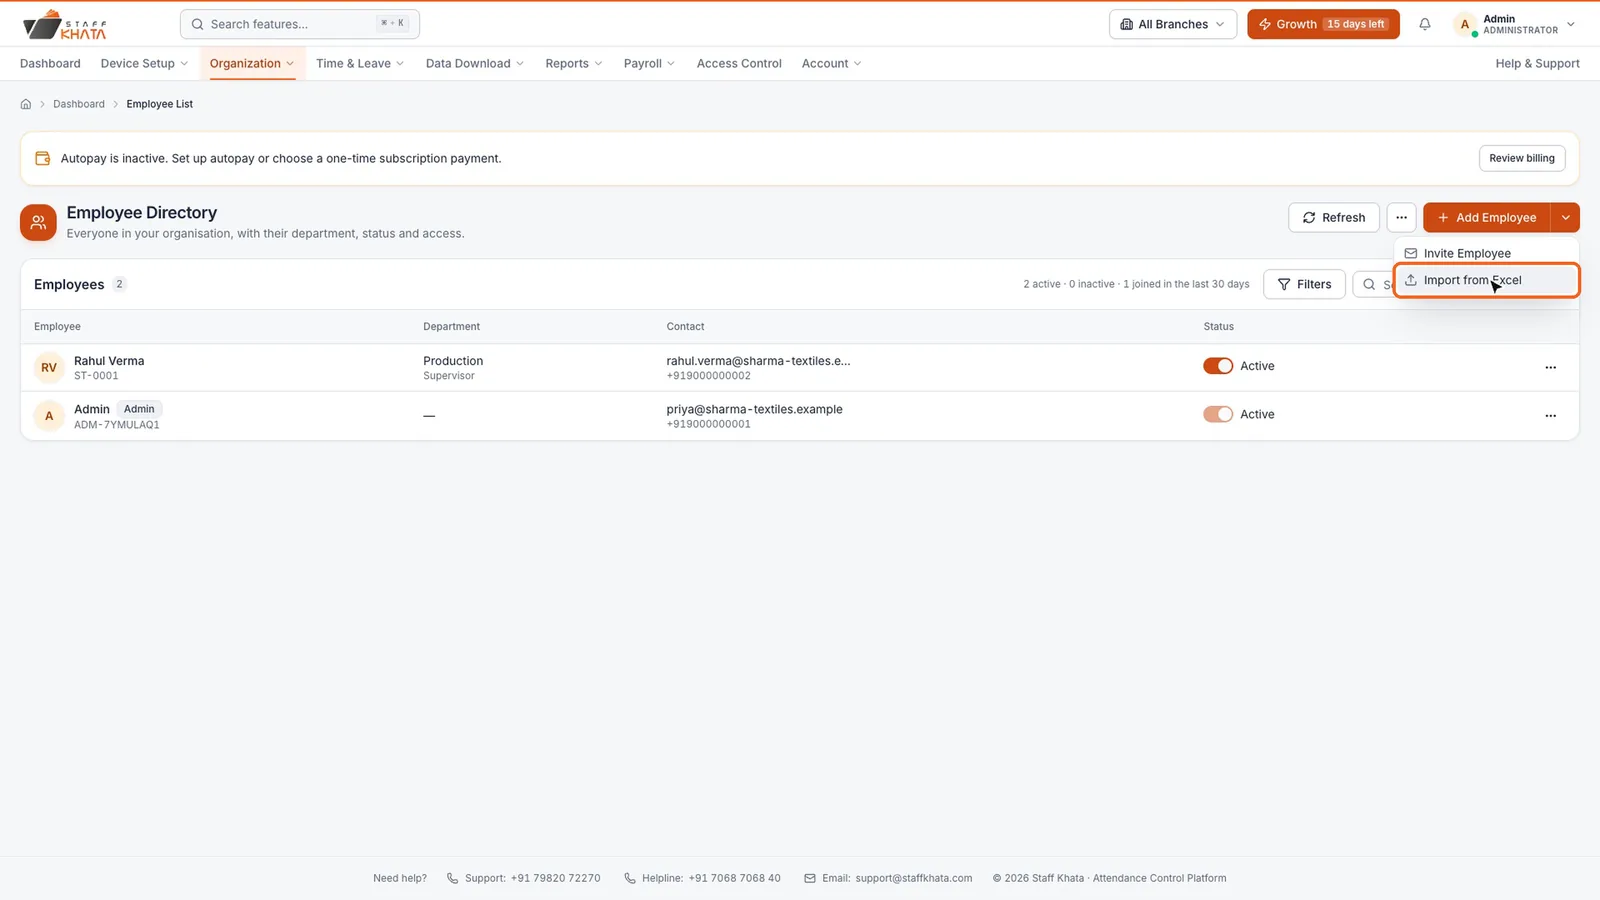
- Click the arrow next to Add Employee and choose Import from Excel.
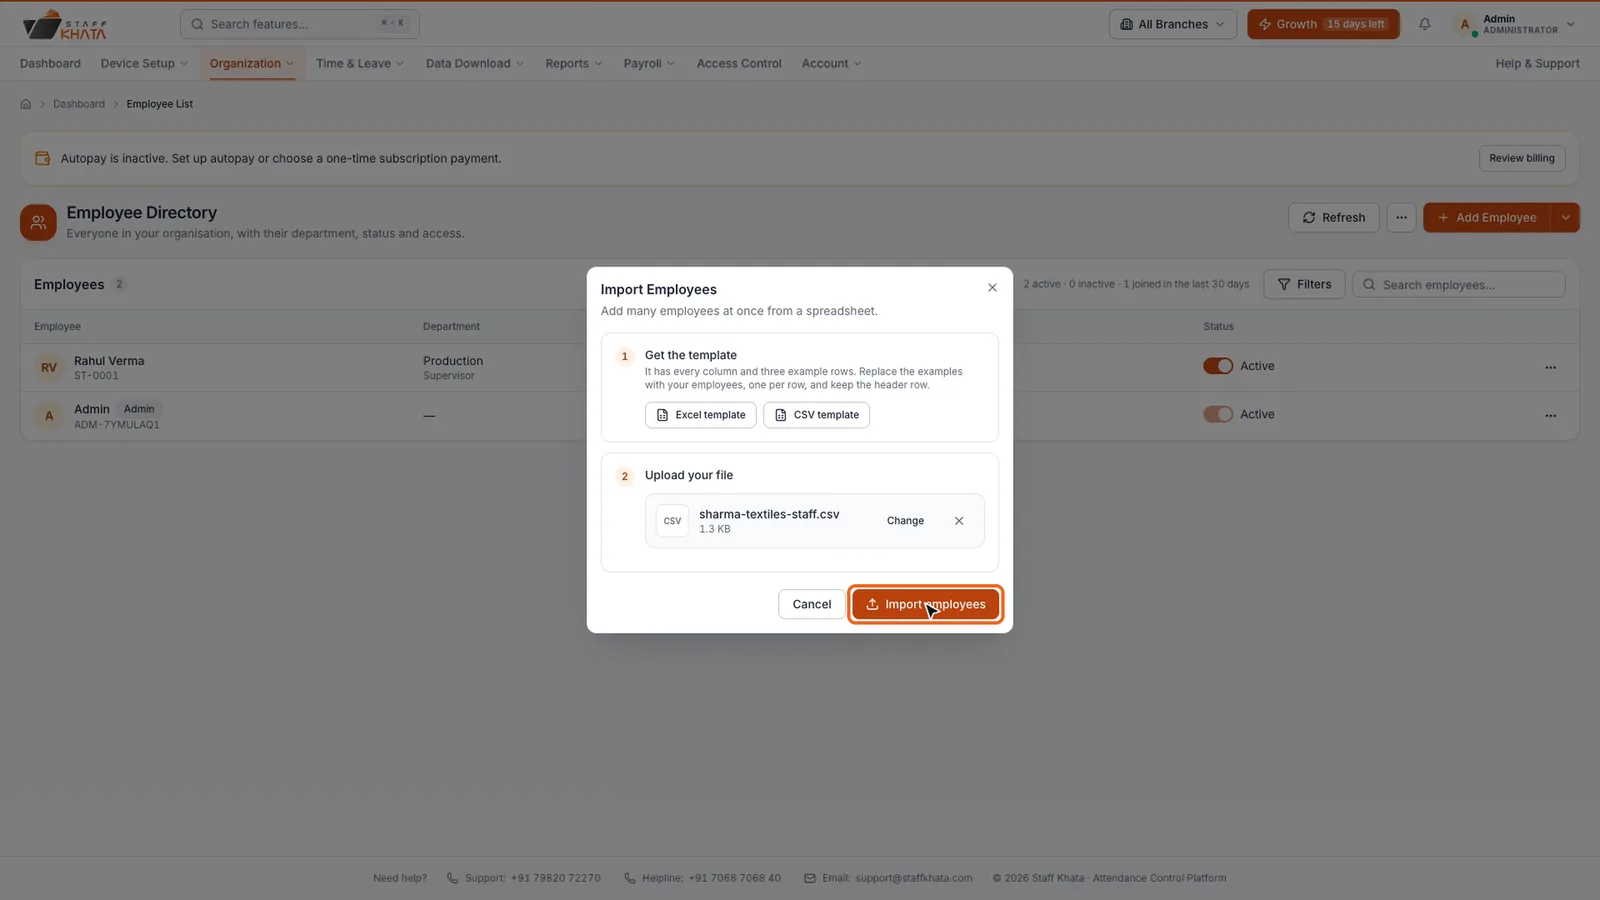
- Under Get the template, click Excel template (or CSV template). It has every column and three example rows.
- Replace the examples with your employees, one per row. Keep the header row.
- Under Upload your file, drop the file or click browse. Excel or CSV, up to 2 MB.
- Click Import employees.
Rows left without an employee code get one from your code format. If some rows fail, Staff Khata lists them under Rows that need fixing. Fix them in the downloaded file and import that file again.
Tip: The template has no password column. Add a column named password to set each employee's first password. Without it, a standard default password is set, so ask staff to change it after they sign in.
Invite employees to fill in their own details
The employee adds their own date of birth, address, emergency contact and bank details.
- Click the arrow next to Add Employee and choose Invite Employee.
- Fill in First Name, Last Name, Email and Phone Number.
- Choose Department, Designation, Role, Branch and Joining Date. Reporting Manager is optional.
- Click Send Invite.
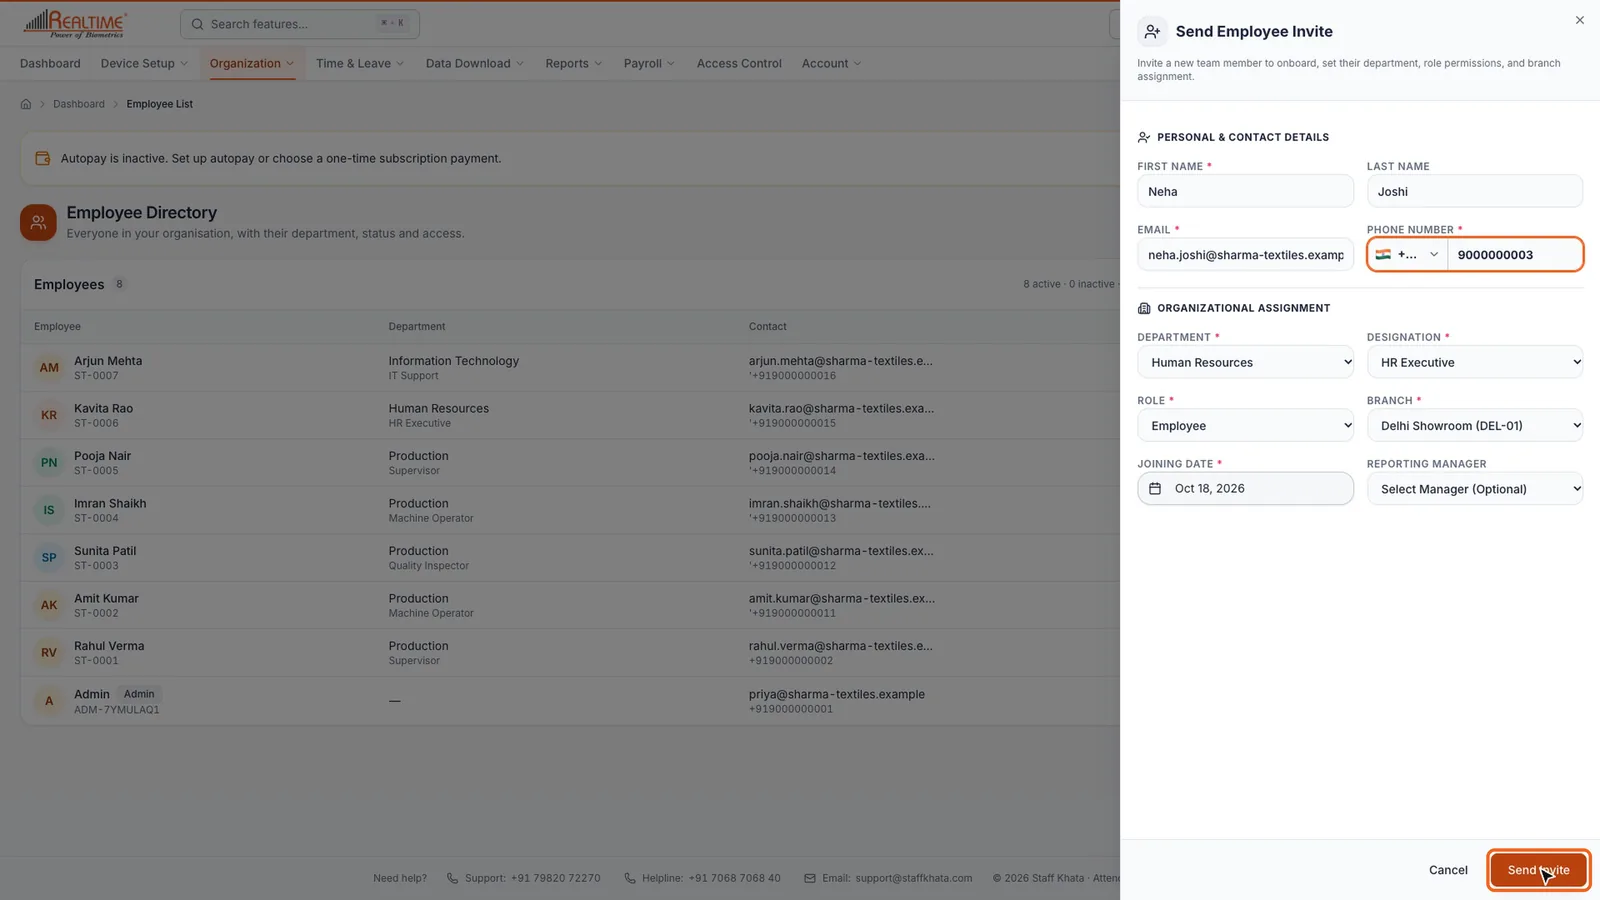
The employee gets a link by email and on WhatsApp. They open it, verify themselves with the one-time code, fill in their details, set a password and click Complete onboarding. The link works for 7 days.
Manage an employee
Open the row menu (⋯) on any employee to:
- Edit Employee: change their details.
- Assign / View Salary: set their salary structure. See Payroll and salaries.
- Biometric enrollment: enrol their fingerprint or card on a Realtime biometric device. See Biometric devices.
- Update Password: set a new password for them.
- Disable Mobile Punch / Enable Mobile Punch: control whether they can punch in from the Staff Khata mobile app with a selfie and their location. Mobile punch is on for new employees; turn it off for staff who should punch only on a biometric device.
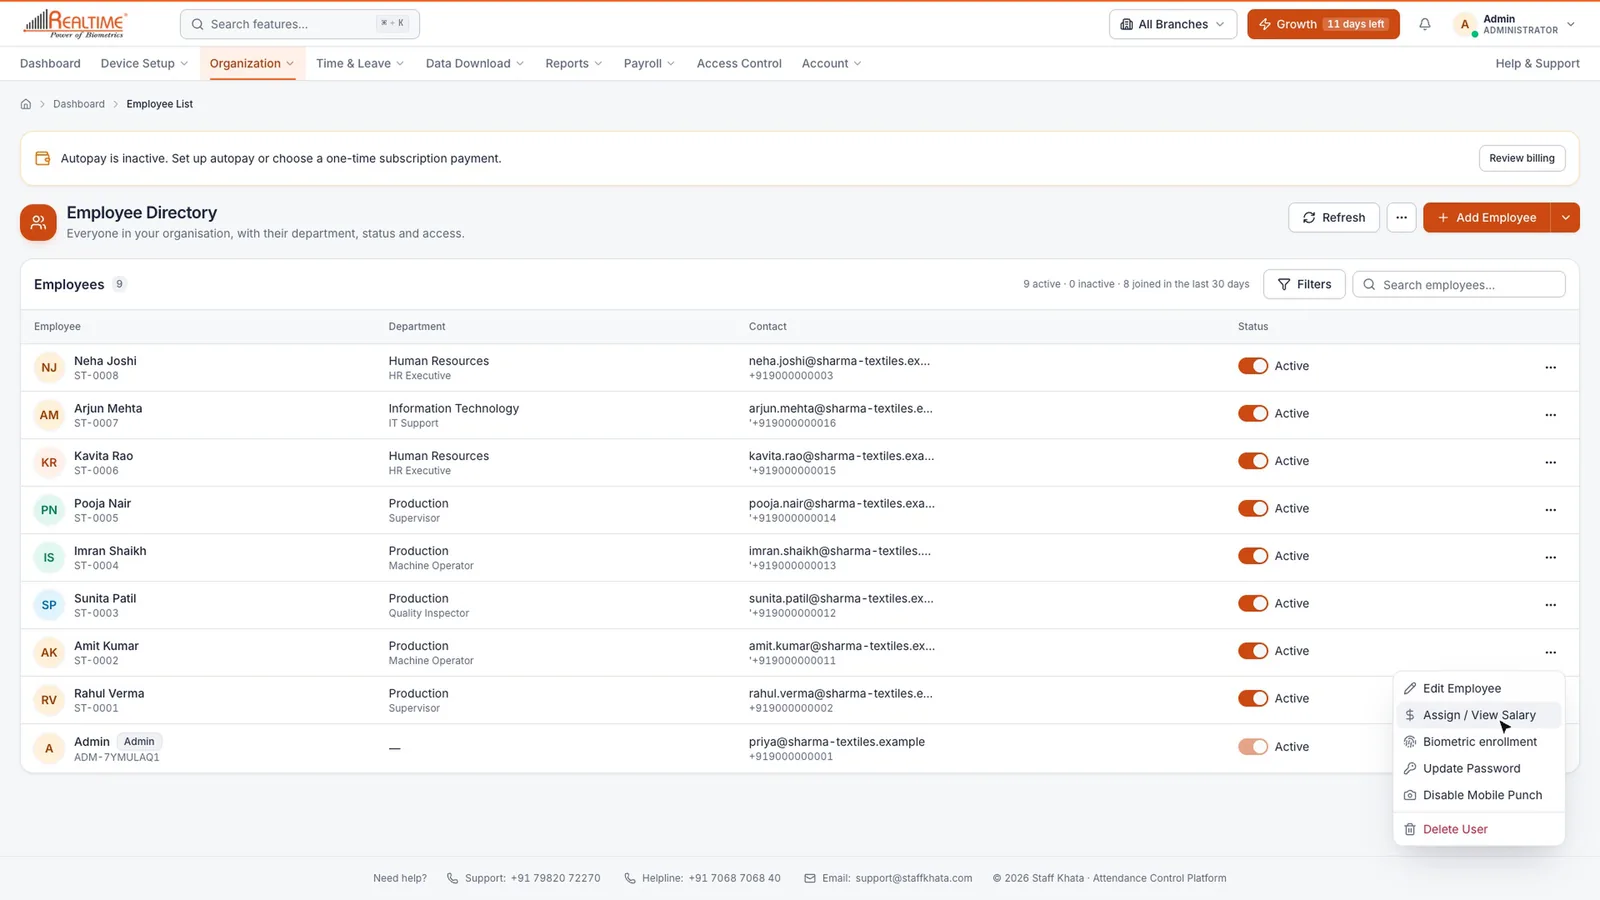
Use the Status switch in the list to make an employee inactive. Inactive employees cannot sign in and are hidden from attendance.
Plan needed: Employee login on the web and mobile app, including mobile punch and self-onboarding, may need a higher plan. Every new company gets a 15-day trial with everything unlocked. See Billing & Plan for current plans.
Next, set up shifts, roster and overtime.
Still stuck? Raise a ticket from Help & Support inside the app, or contact us at staffkhata.com/contact.