
Pro HRMS (add-on)
Plan: Pro HRMS add-on
Pro HRMS adds the HR tools you need beyond attendance: a company feed, your reporting structure, referrals, asset tracking, policies and a support desk. It also adds the Manager role, so team leads can look after their own people.
Plan needed: Pro HRMS is a paid add-on. Its menus appear only once it is active on your account. See Billing & Plan for current prices.
Find the Pro HRMS menu
Once the add-on is active, a Pro HRMS menu appears in the top bar for admins and managers, and in the employee panel. Everything below lives in that menu.
Organisation Feed
A shared wall for announcements, welcomes and celebrations.
- Click Pro HRMS → Organization Feed.
- Type in the post box. Click Photo / Video to attach media.
- Choose who sees it: Everyone or Specific Department.
- Click Post.
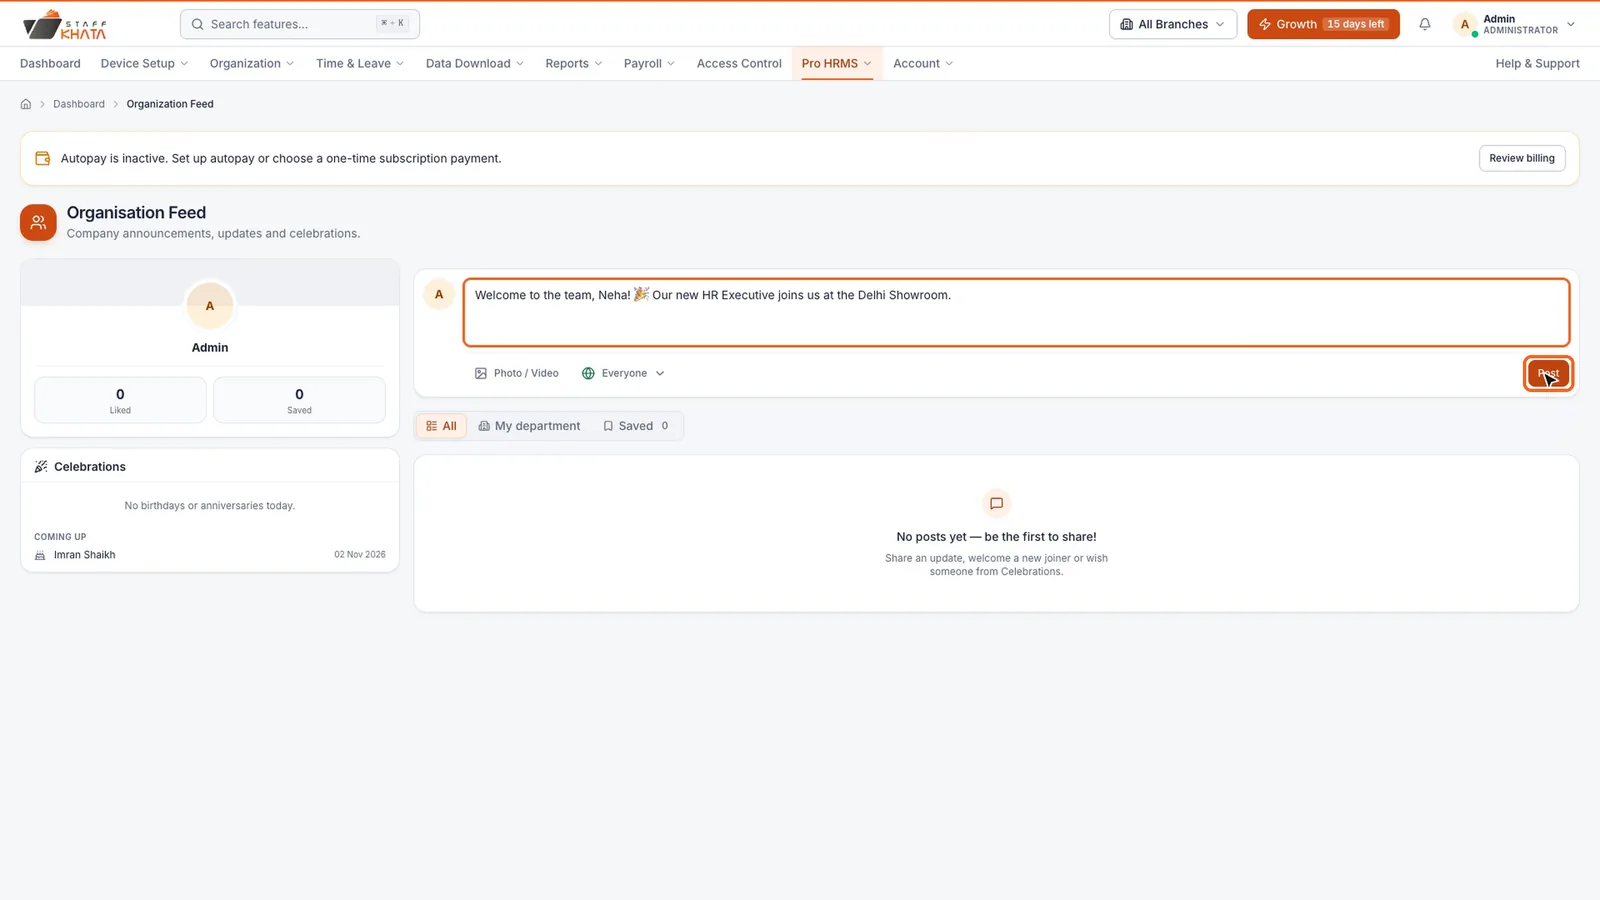
Employees can like, comment and save posts. The Celebrations card shows today's and upcoming birthdays and work anniversaries.
Org Tree
The Org Tree shows who reports to whom.
- Click Pro HRMS → Org Tree.
- Click Create First Position (later, Create Root Position).
- Pick the employee under Link to Employee, then fill in Position Name, Department and Designation. Responsibilities and a photo are optional.
- Click Create Position. Use Add Direct Report on a position to build the tree downwards.
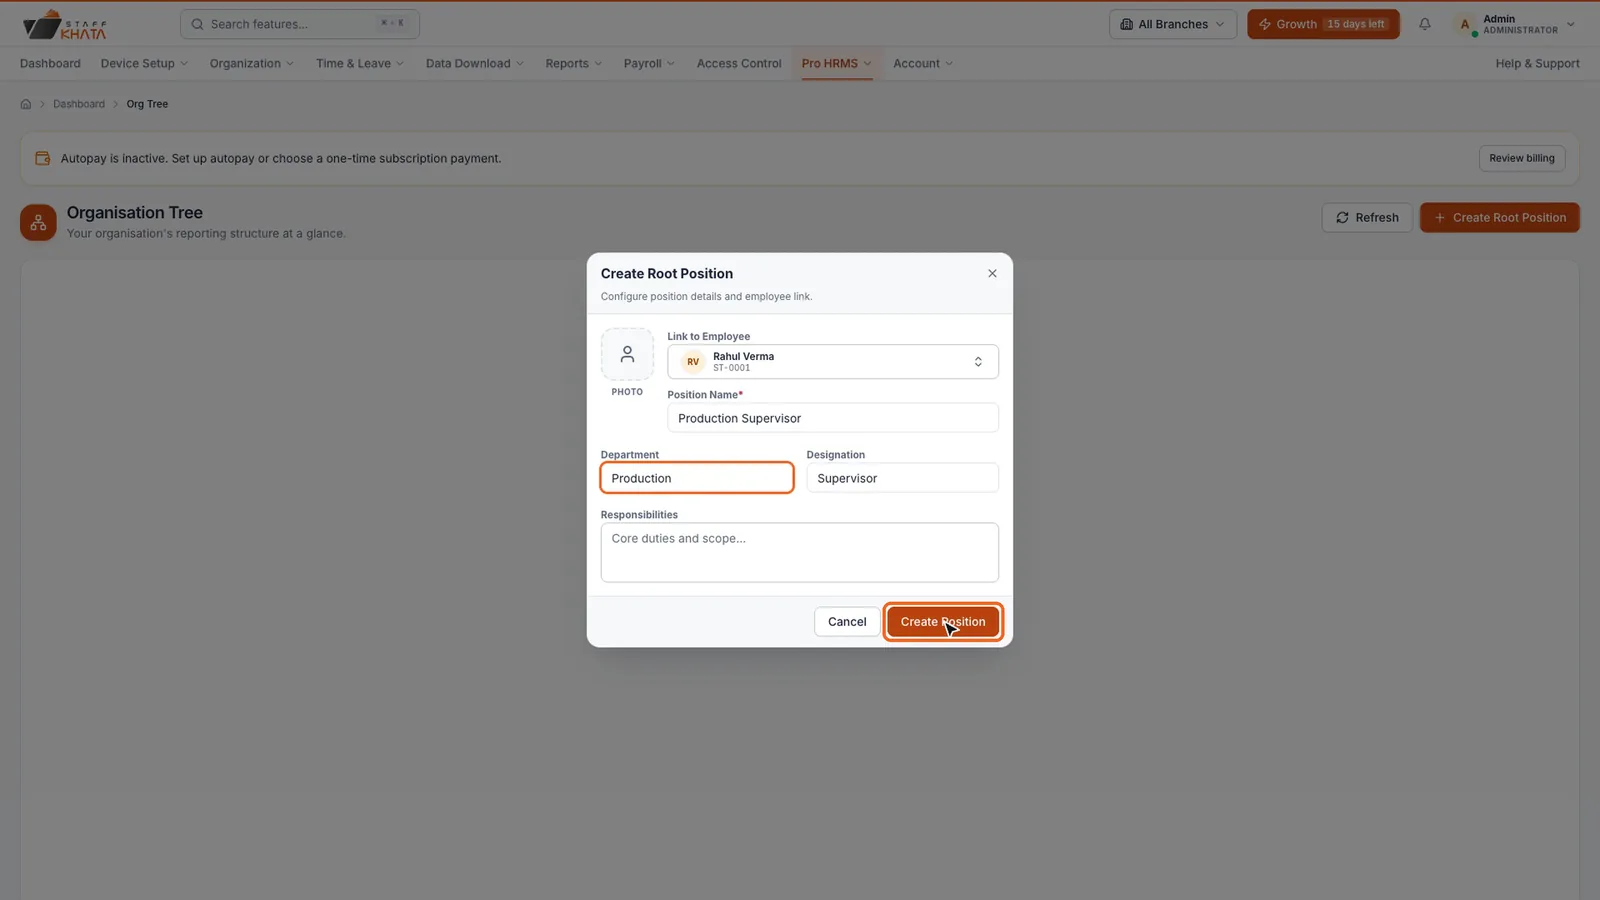
A position can stay vacant until you hire for it. Employees see the tree under My Org Tree.
Job Referrals
- Click Pro HRMS → Job Referrals → Add Job Opening.
- Enter the Job Title, Description, Location and Department, then save.
Employees see open positions on their Job Referrals page and click Refer Now to put forward someone they know. You review candidates under View Referrals and move each one to Pending, Hired or Rejected.
Daily Work Updates
Employees click Submit Today's Work Update and describe what they worked on. Admins and managers see everyone's updates under Pro HRMS → Daily Work Updates, filtered by date or employee, and can Export them.
Assets
Keep track of company laptops, phones and other property.
- Click Pro HRMS → Assets → Add Asset.
- Pick a type (for example Laptop), enter the Asset Name and Serial Number, and save.
- In the Inventory list, click Assign on the asset, choose the employee under Select Employee, and click Assign Asset.
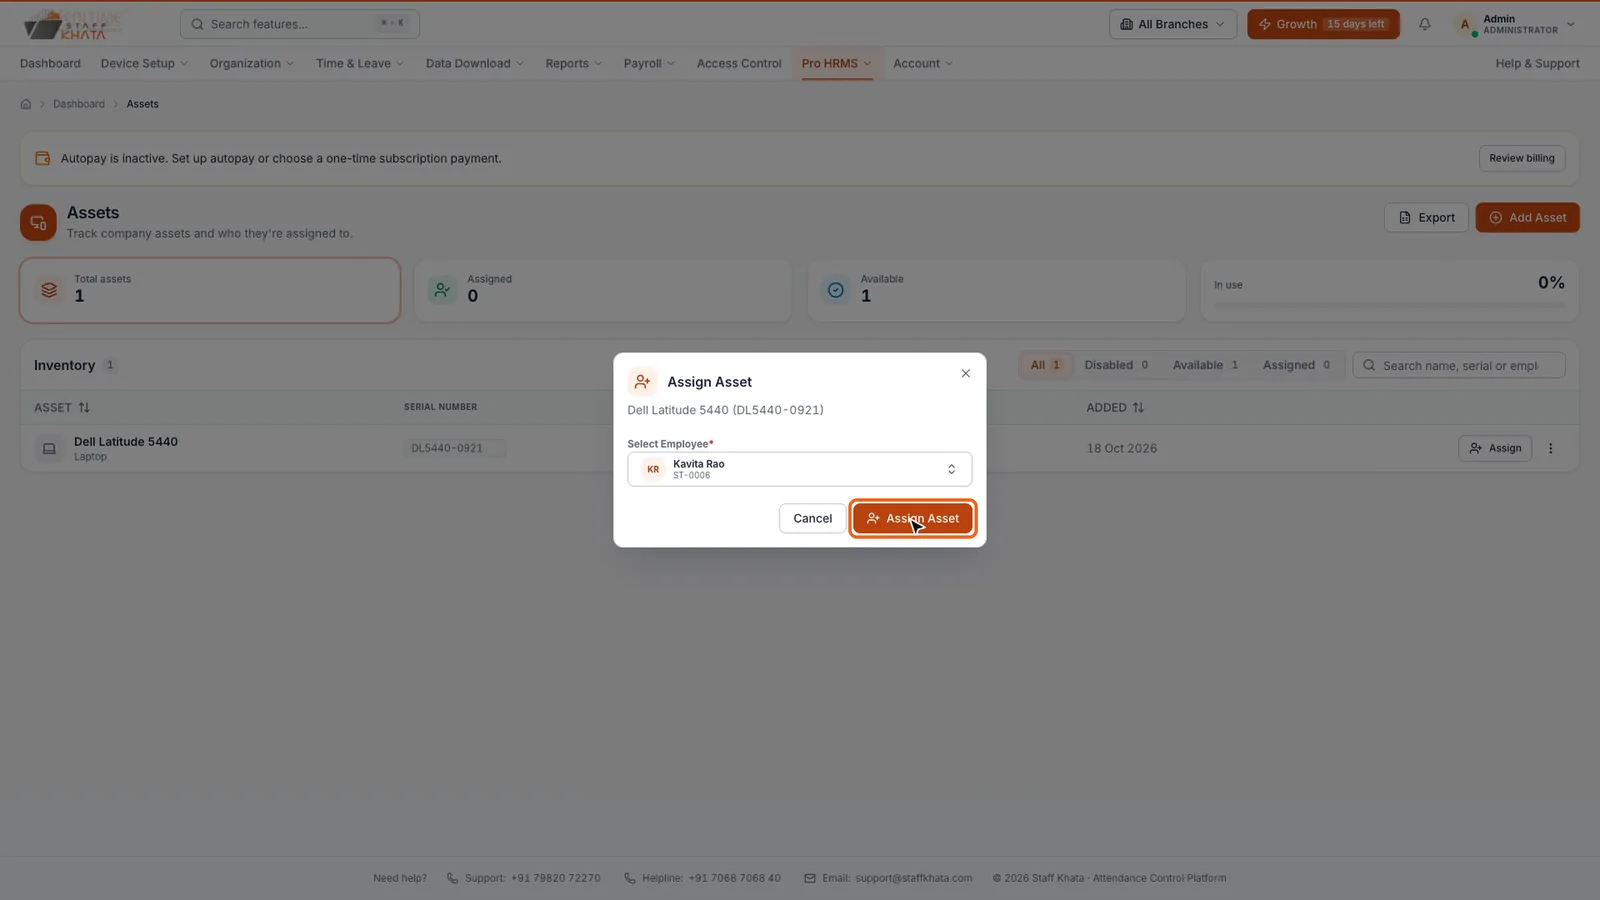
Each asset keeps an Assignment History. Employees see what they hold under My Assets.
Policy Documents
Click Pro HRMS → Policy Documents → Upload Document. Enter the Policy Name and Policy Category, and choose a file (PDF, Word, Excel, PowerPoint or image, up to 2 MB). Employees open the policy and click Acknowledge, and you can see who has acknowledged it.
HR Support
A help desk for questions about attendance, leave, payroll and other HR matters. Employees click Raise Ticket, add a subject, description and up to 5 files. HR and admins see all tickets under Pro HRMS → HR Support and move them through Open, In Progress, Resolved and Closed with Update Status.
Make someone a manager
- Click Organization → Employee List and edit the employee.
- Open the Employment step and set System Role to Manager.
- Click Save Changes.
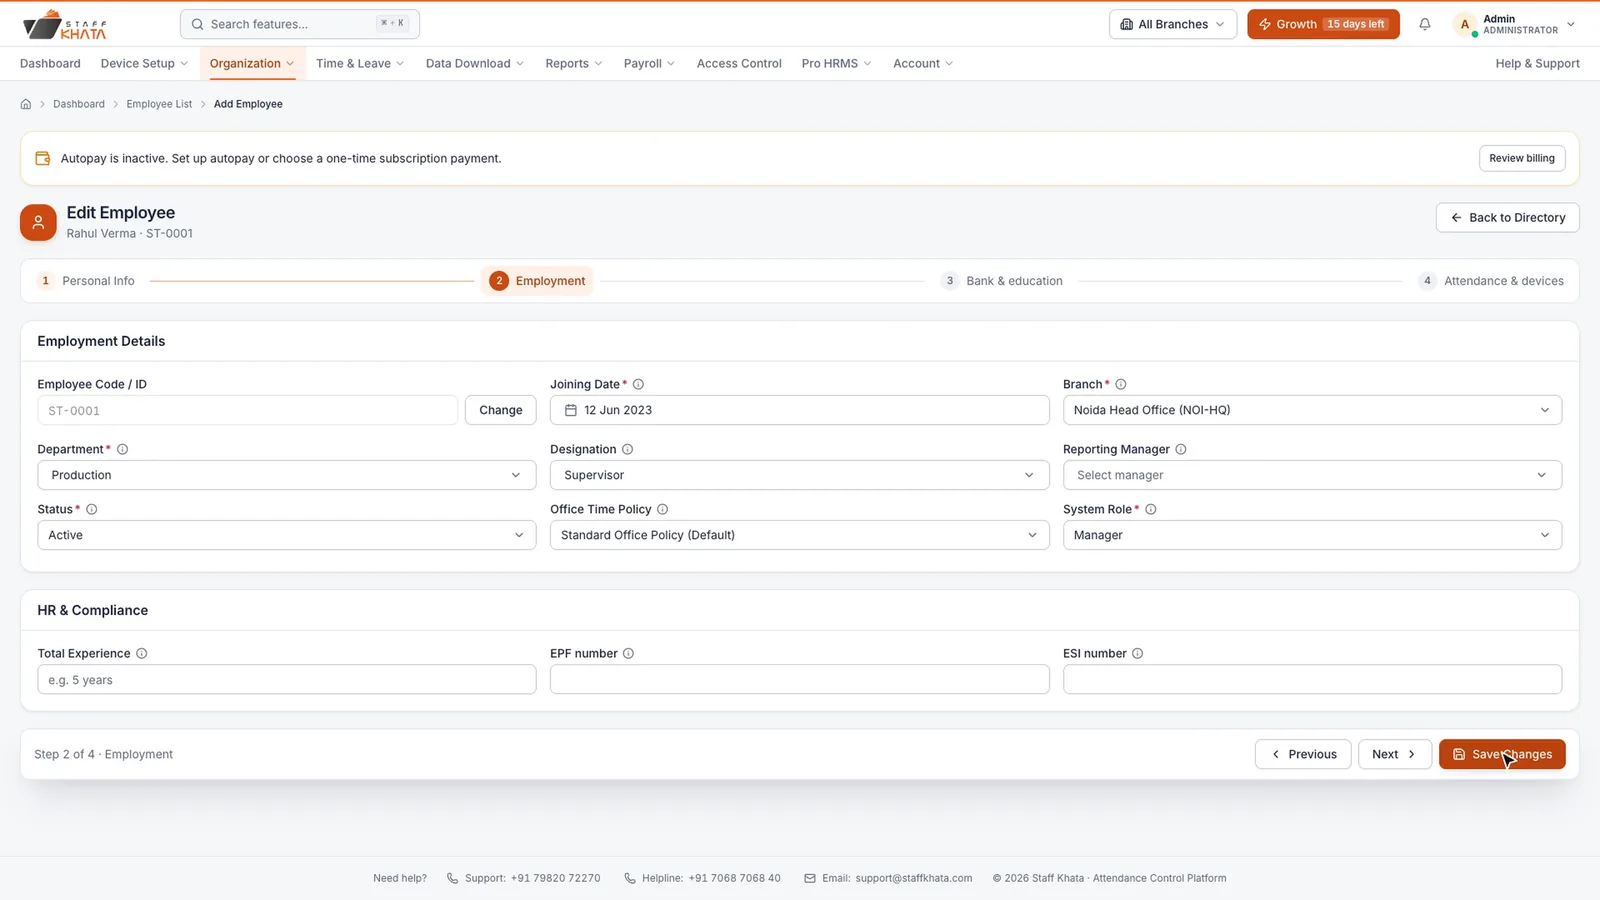
A manager's team is everyone whose Reporting Manager is that person. Set it on each team member's Employment step.
Note: The Manager option in System Role appears only when Pro HRMS is active.
The manager panel
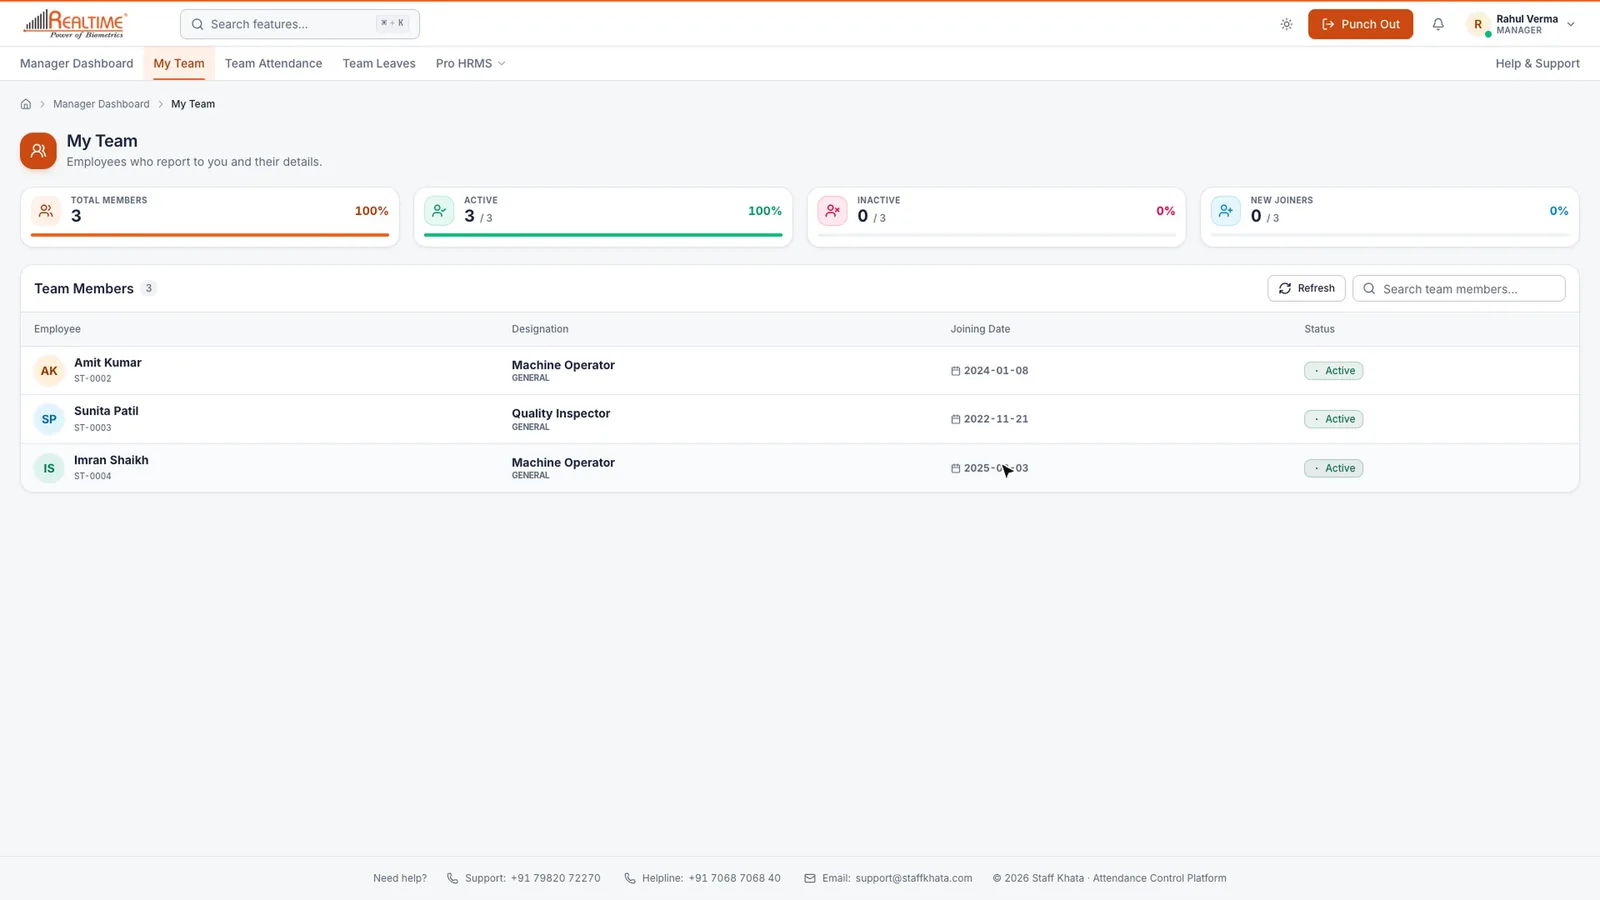
When a manager signs in, they land on the Manager Dashboard. The menu has:
| Page | What managers do there |
|---|---|
| My Team | See everyone who reports to them, with designation, joining date and status. |
| Team Attendance | Check the team's daily attendance and punches, and review attendance correction requests. |
| Team Leaves | Review the team's leave requests and approve or reject them. |
Approve a leave request
- Click Team Leaves.
- Click the eye icon on a request to open Leave Request Details.
- Click Approve, or Reject with a reason.
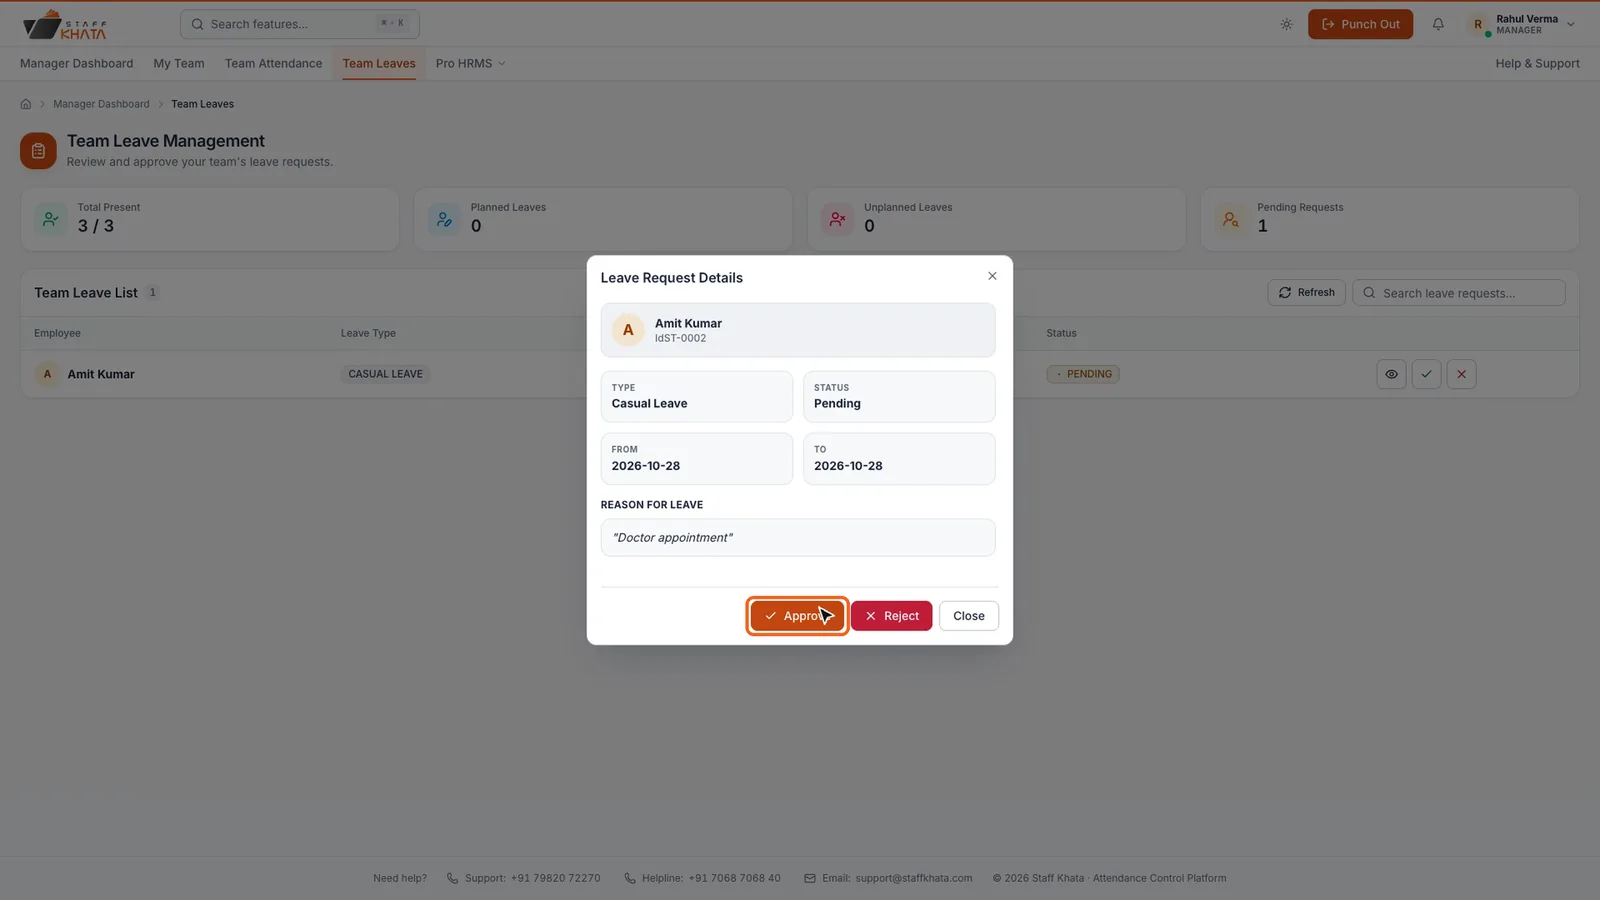
A leave needs both the manager and HR to approve it. After the manager approves, the request shows "Approval Pending from HR" until HR gives the final approval. If either one rejects it, the leave is rejected.
Still stuck? Raise a ticket from Help & Support inside the app, or contact us at staffkhata.com/contact.