
Leave types, leave requests and holidays
Plan: Plans with leave and holidays
Set up the kinds of leave your staff can take and your holiday list once. After that, leave requests, balances and holidays flow into attendance and payroll on their own.
Plan needed: Leave management and holidays can be locked on lower plans. If the menus show a lock, see Billing & Plan for current prices and plans.
Define leave types
Casual, Sick, Earned and Maternity leave are already set up for you. Edit them or add your own.
- Click Organization → Define Leave. The Leave types list shows each type's code, days per year, what happens to unused days, and whether it needs approval.
- Click Add Leave Type.
- Fill in the form:
| Setting | What it does |
|---|---|
| Name and Code | For example "Compensatory Off" and "CO". Both are required. |
| Days per year | How many days each employee gets in a year. |
| Carry forward unused days | On: days not taken move to next year. Off: they lapse at year end. |
| Needs approval | On: the reporting manager or HR must approve each request. |
| Colour | Shown on calendars and leave badges. |
- Click Add Leave Type.
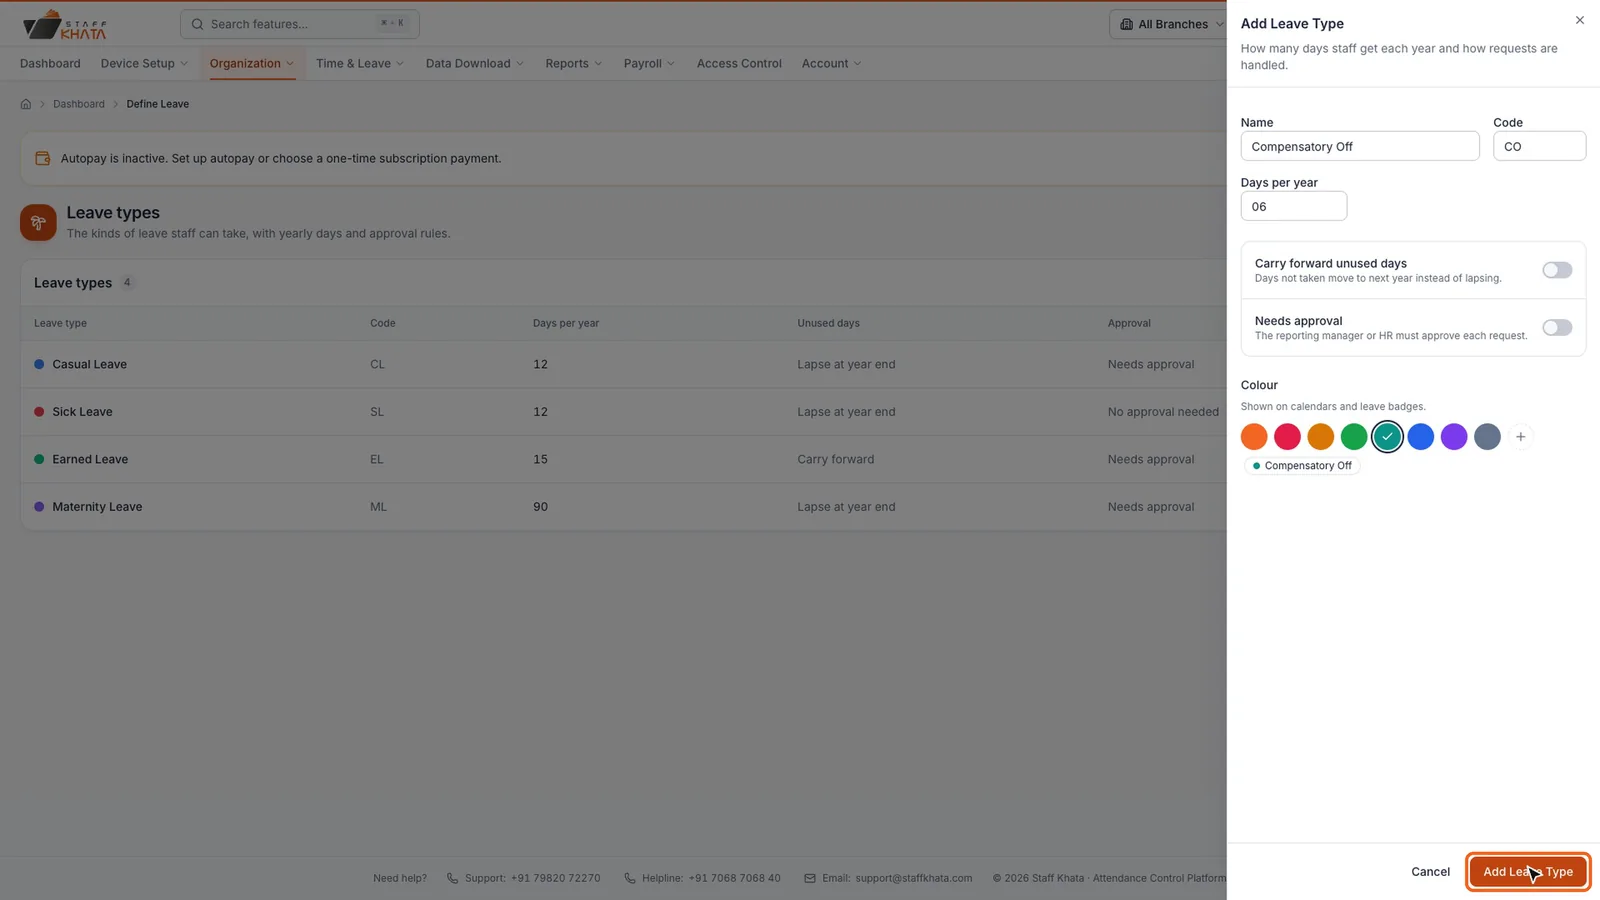
To change or remove a type, use Edit or Delete on its row.
Check leave balances (Leave Opening Entry)
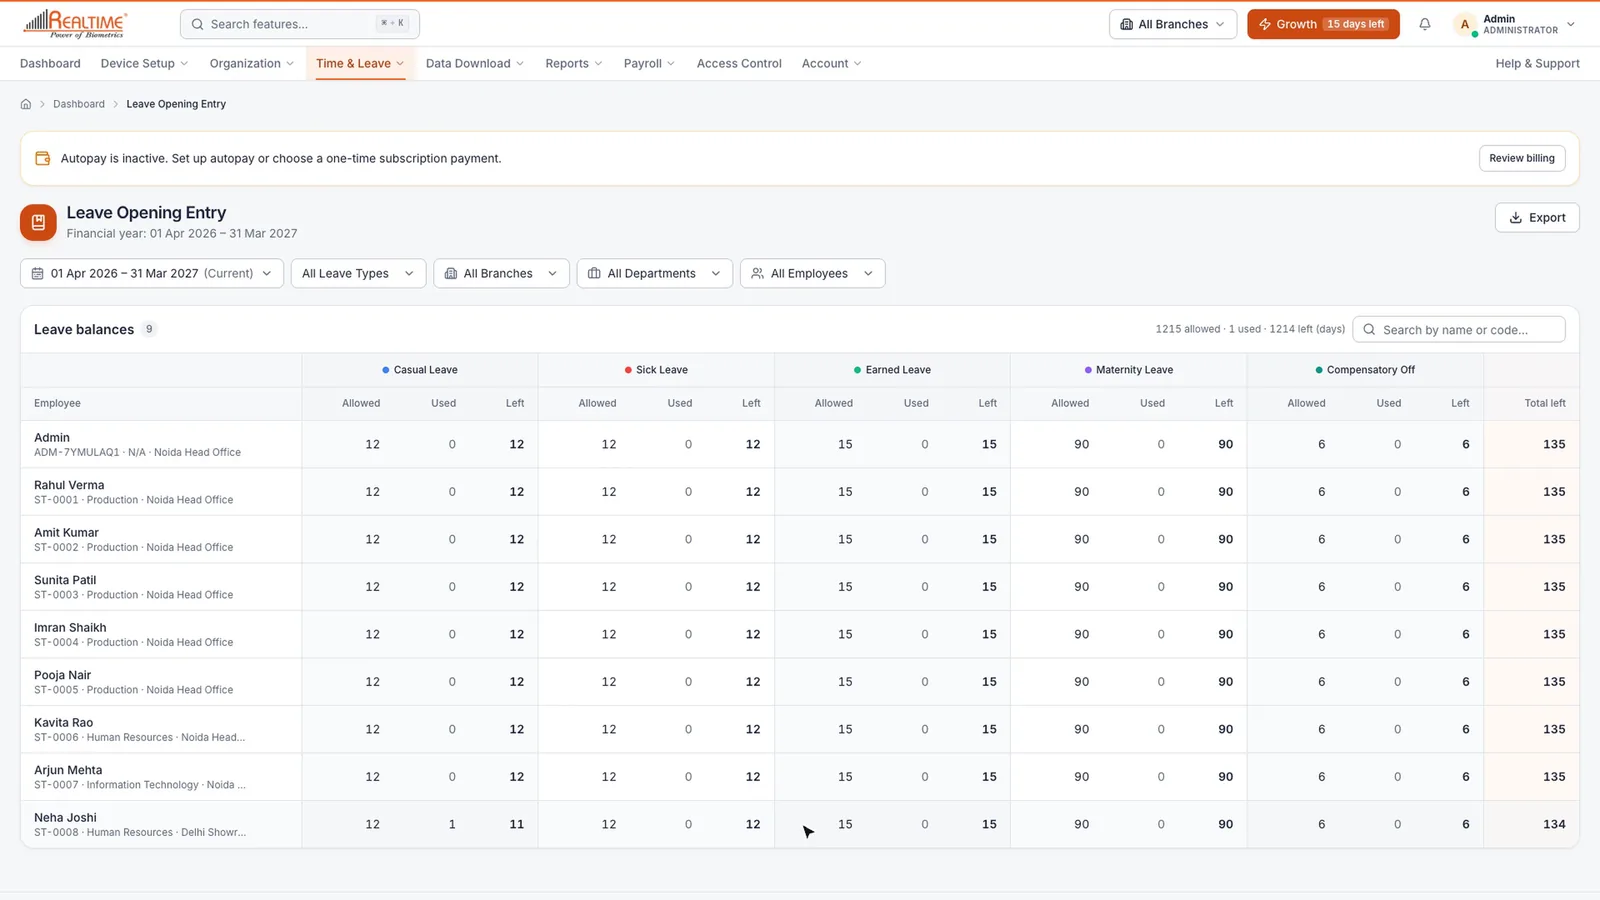
- Click Time & Leave → Leave Opening Entry.
- For each employee and leave type you see days Allowed, Used and Left, plus Total left.
- Change the financial year at the top left, or filter by leave type, branch, department or employee. Click Export to download the table.
How employees apply for leave
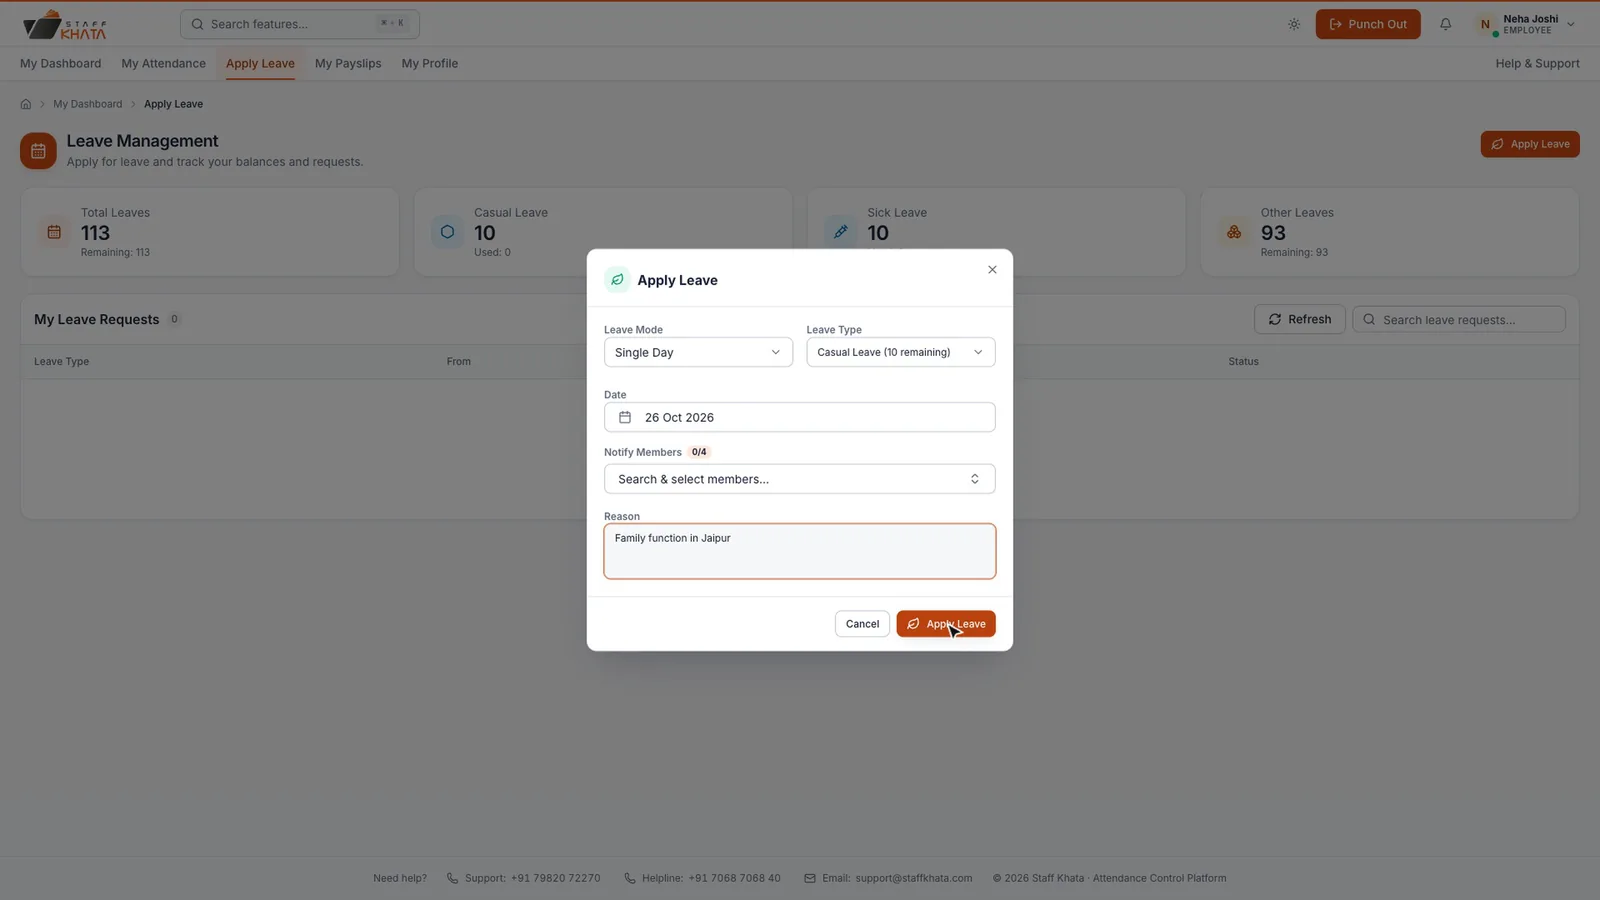
Employees sign in with their own email and password, on the web at https://attendance.staffkhata.com or in the Staff Khata app (the Leave tab). They open Apply Leave, see their balance for each leave type, choose the type and dates, add a reason and send it. The request then waits for approval.
Apply leave on an employee's behalf
Useful when someone phones in sick or does not use the app.
- Click Time & Leave → Leave Application.
- Click Apply leave.
- Choose the Employee, then the Leave type. The days left are shown next to each type.
- Choose One day, Half a day or Several days, and pick the date or dates.
- Add a Reason. Under Also notify, you can pick people to inform.
- Click Apply leave.
Approve or reject leave
- Click Time & Leave → Leave Application. Leave requests opens on Pending.
- Click Review on a request. Check the leave type, dates, days and reason.
- Click Approve or Reject, then confirm.
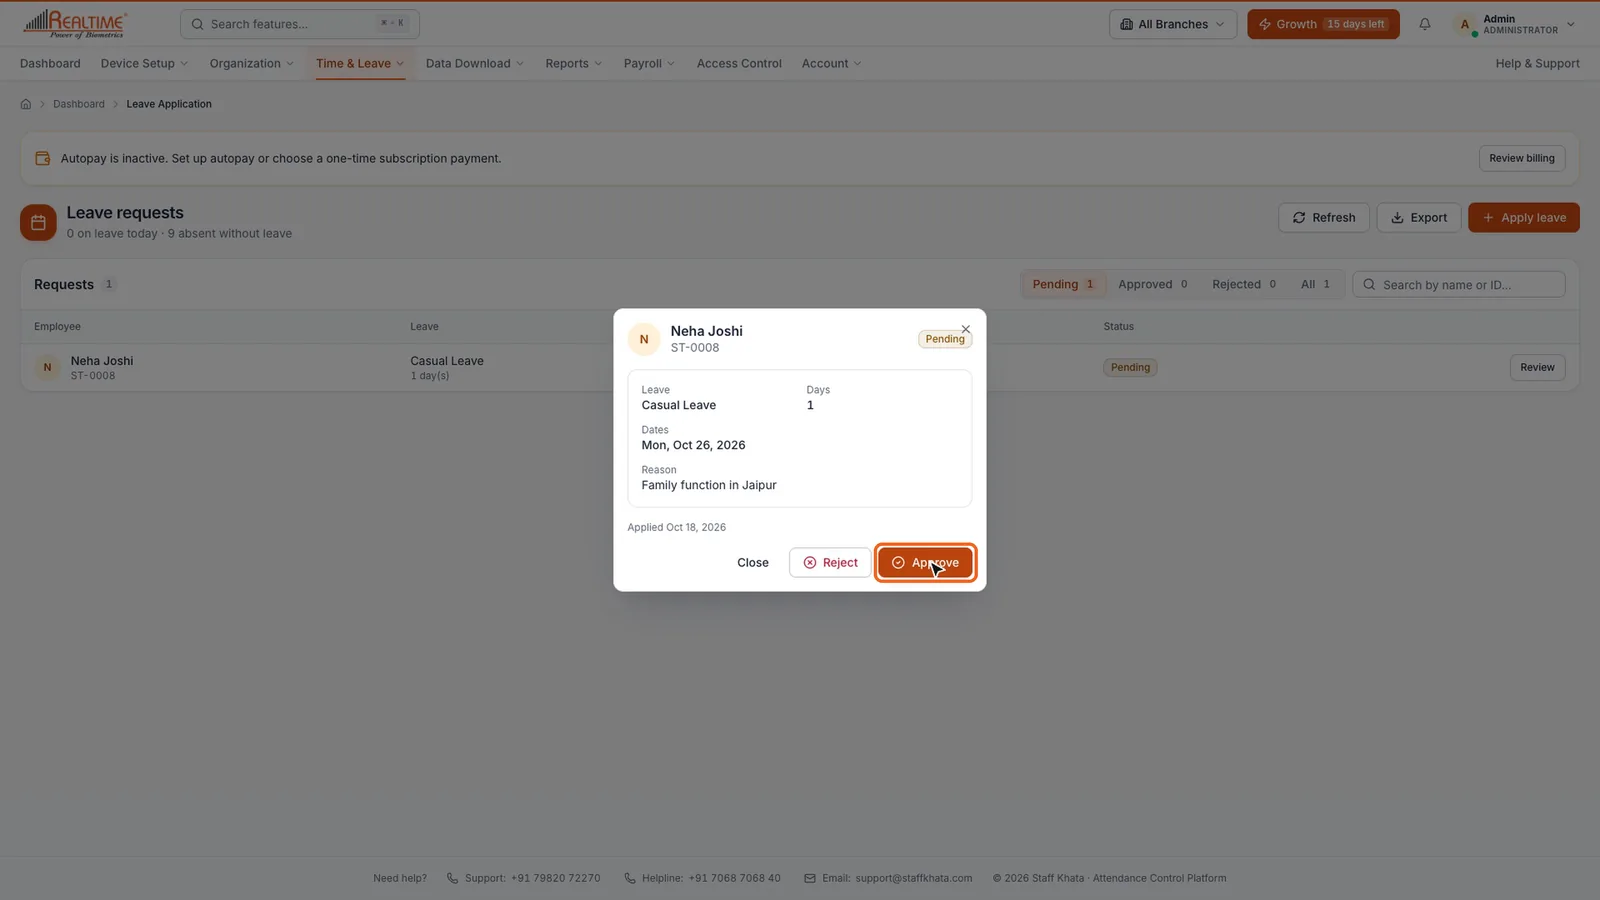
The Approved, Rejected and All tabs keep the history. You can still change a decision later from a request's details.
Add your holidays
Holidays are shown on calendars and used in attendance reports. The quickest start is to import your list.
Import from a spreadsheet
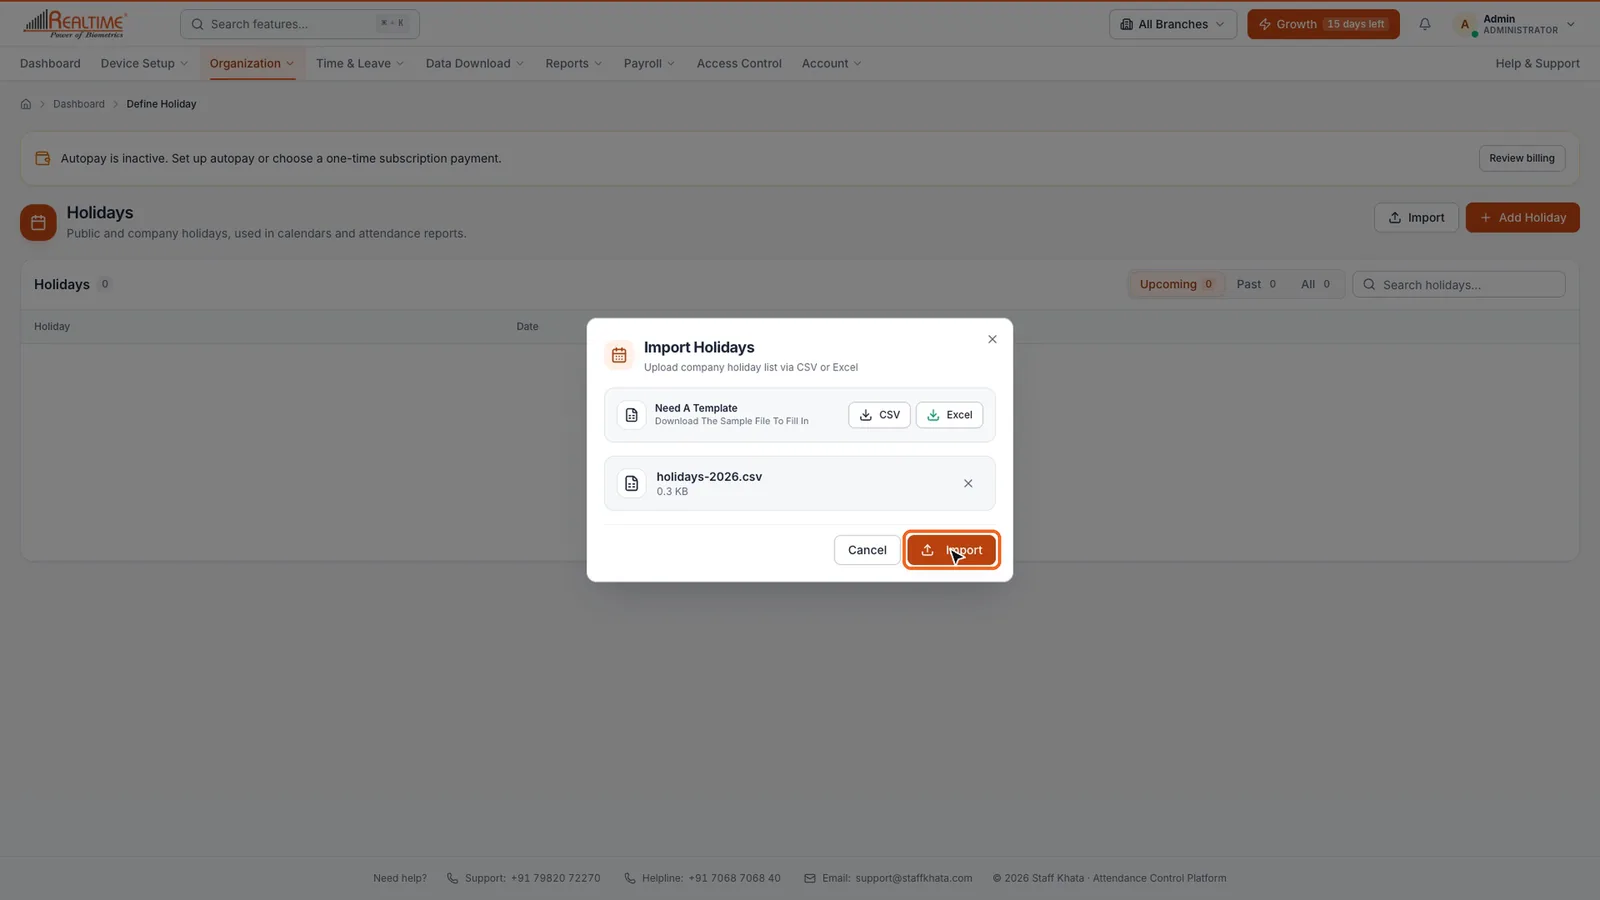
- Click Organization → Define Holiday.
- Click Import.
- Under Need A Template, click CSV or Excel to download a sample. It has three columns: Holiday Name, Type (Full Day or Half Day) and Date (DD-MM-YYYY).
- Fill it in, then drag the file into the box or click to browse. CSV, XLS and XLSX files up to 2 MB work.
- Click Import. All your holidays are added at once.
Add one holiday
- On Define Holiday, click Add Holiday.
- Enter the Name, pick the Date, and choose Full day or Half day. A Description is optional.
- Click Add Holiday.
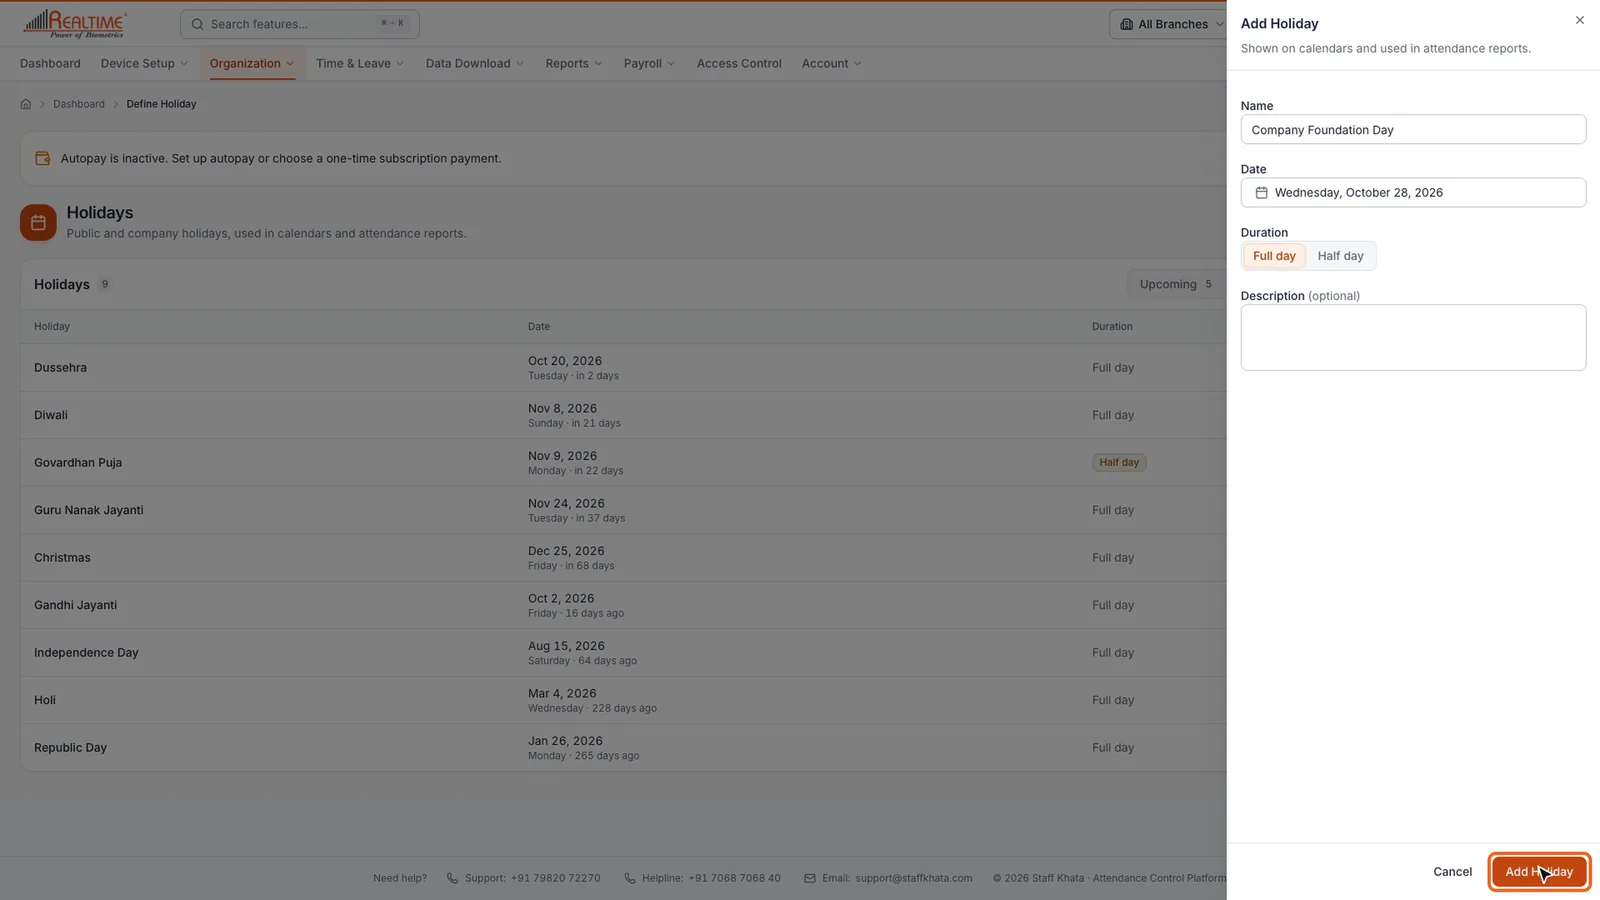
Use the Upcoming, Past and All tabs to browse the list, and Edit or Delete on a row to change it.
Still stuck? Raise a ticket from Help & Support inside the app, or contact us at staffkhata.com/contact.