
Plans, billing and support
Plan: All plans
This chapter shows where to see your plan, how to upgrade, how to pay and download invoices, and how to get help. Only the Admin can see the plan badge and upgrade.
See your current plan
Your plan is always shown at the top of the page, with the number of trial days left.
- Click the plan badge at the top right.
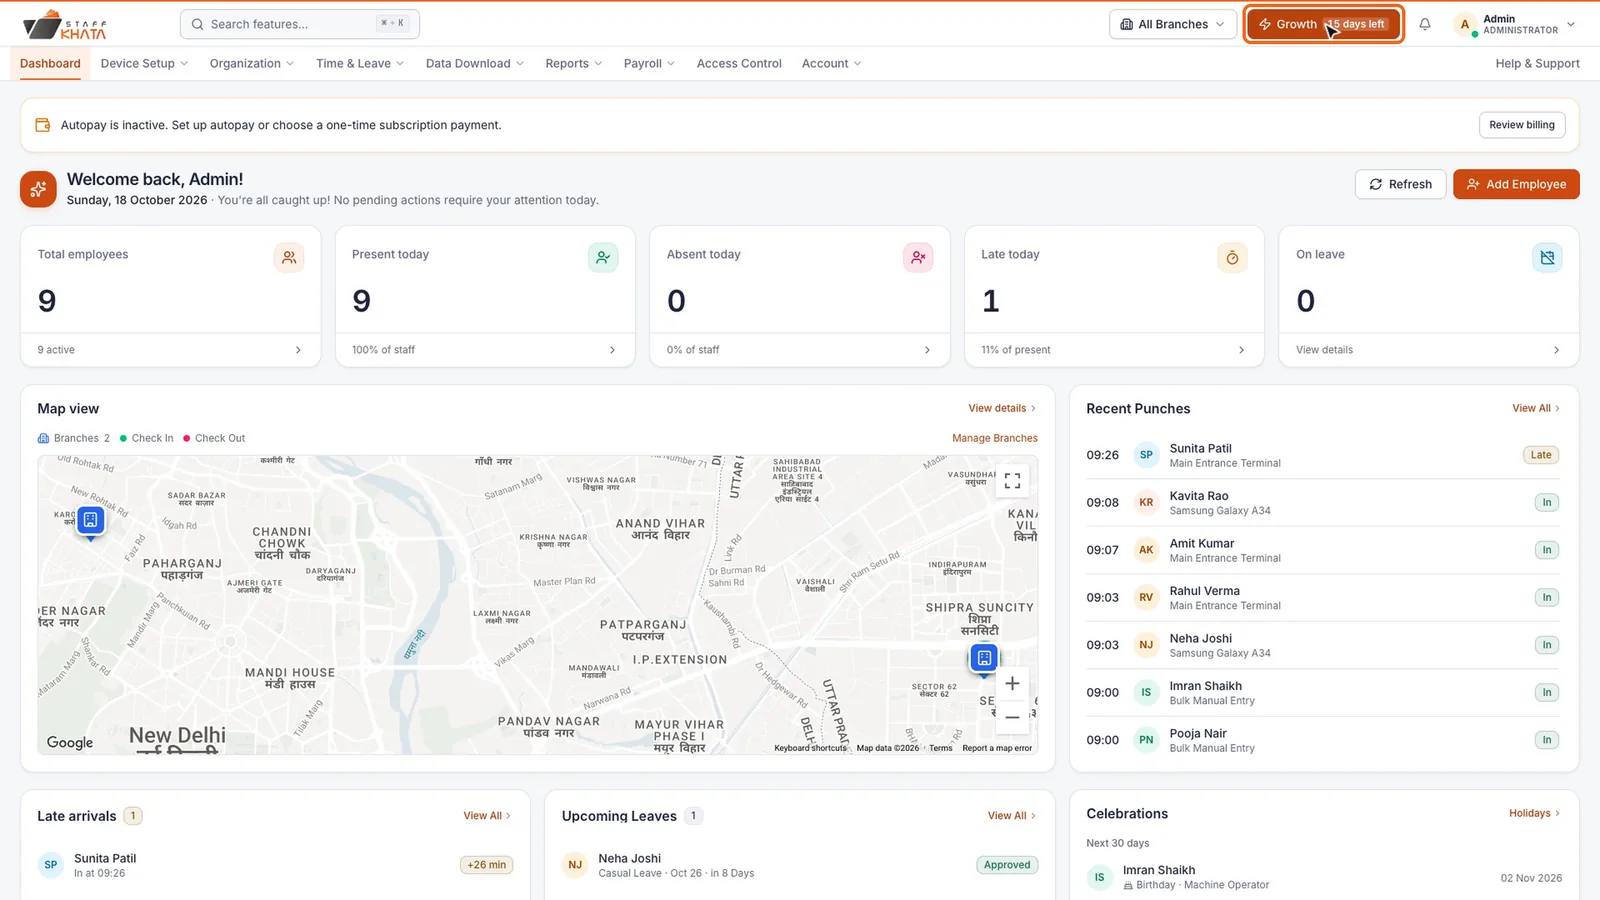
- The Manage Subscription page opens. It shows your plan name, how many users and devices it allows, and how many trial days remain.
- Under Included Features, you see every module your plan includes, such as Attendance Tracking, Shifts, Leave Management, Payroll and Employee Login.
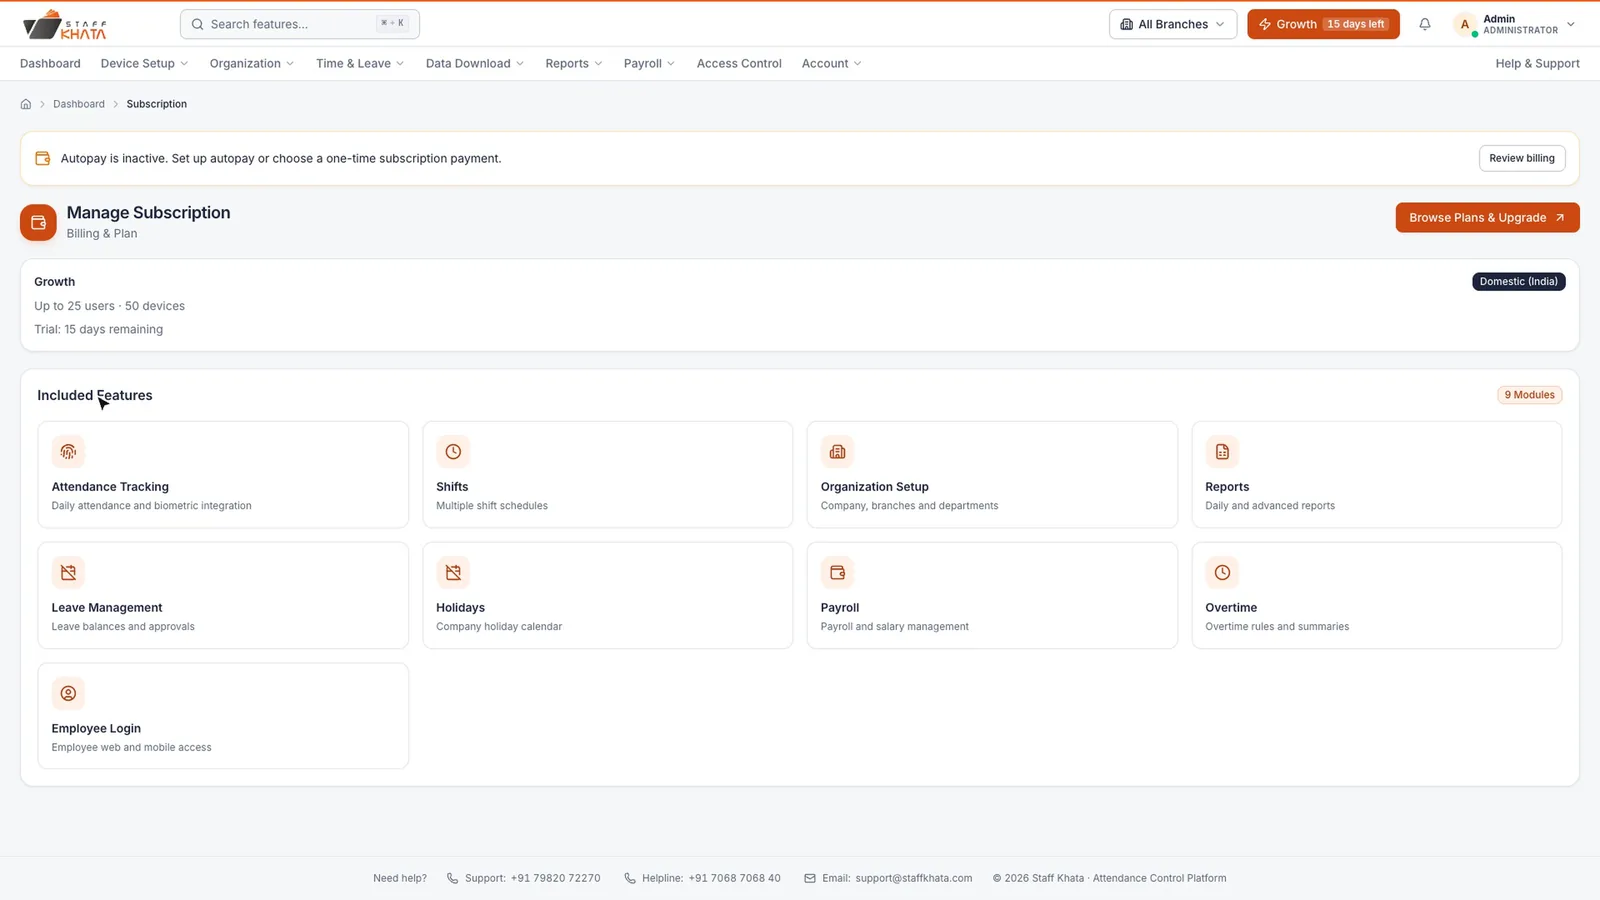
Note: During the 15-day trial, everything is unlocked. After the trial your account moves to the entry plan, and some features may lock until you upgrade.
Upgrade your plan
Upgrade when you need more users, more devices or a locked feature.
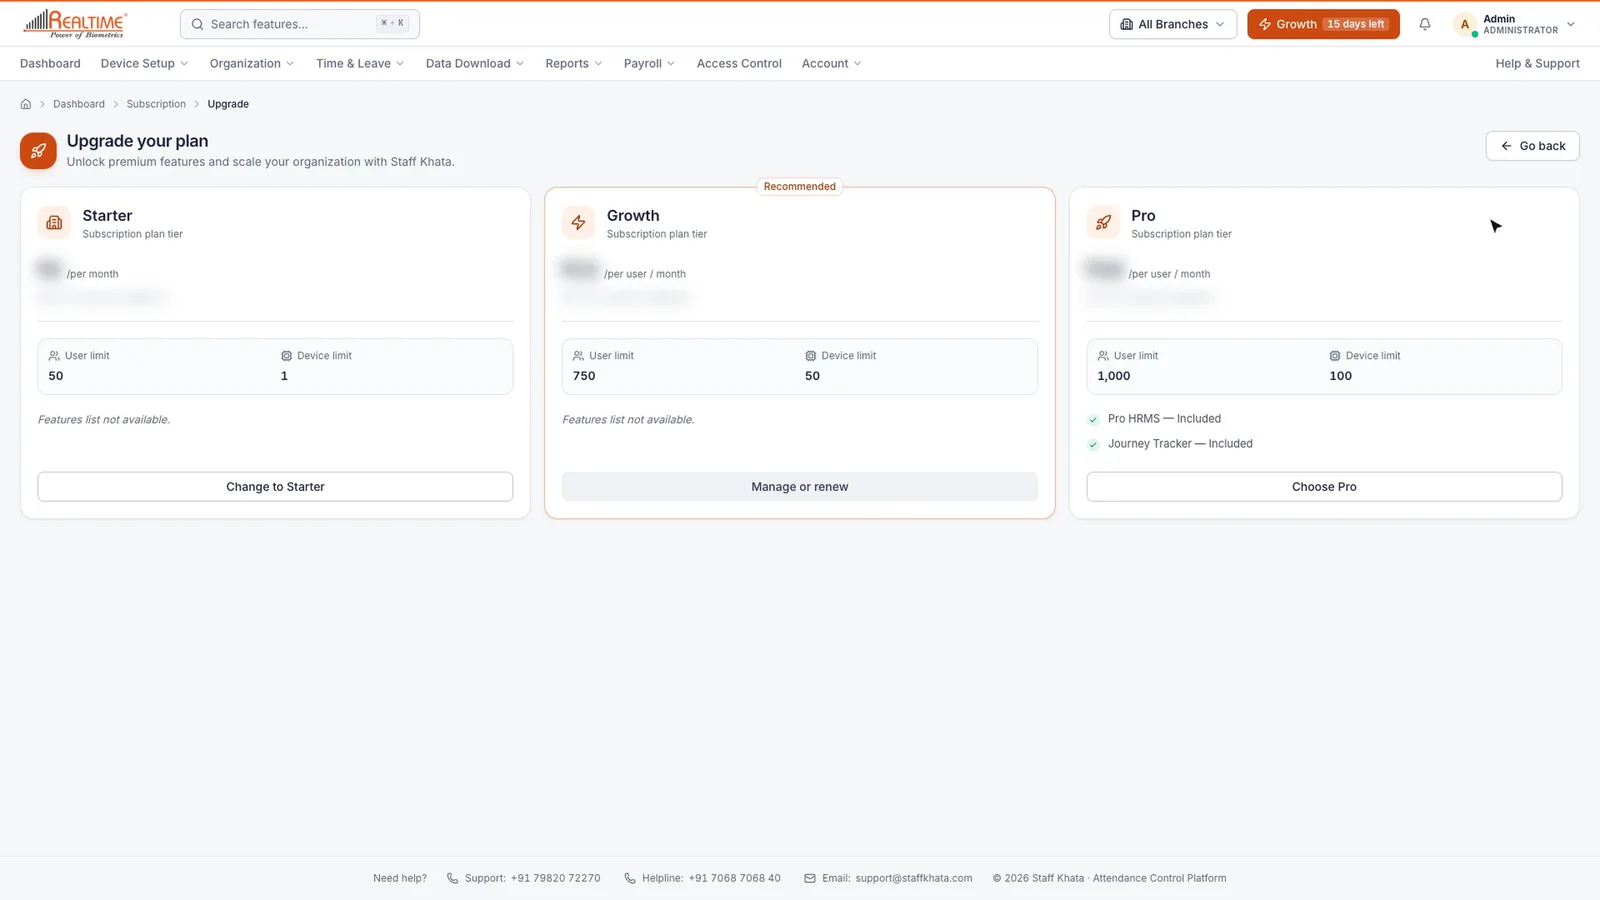
- On Manage Subscription, click Browse Plans & Upgrade.
- Upgrade your plan shows each plan side by side, with its User limit, Device limit and features. One plan is marked Recommended. Some plans include add-ons such as Pro HRMS or Journey Tracker.
- Click the button on the plan you want. On your current plan the button is Manage or renew.
Complete checkout
The checkout window lets you choose:
| Option | What it does |
|---|---|
| Monthly or Yearly | How often you pay. |
| Purchased seats | How many users you pay for. Include room for future hires; your bill covers all purchased seats. |
| Add-ons (optional) | Extra modules, such as Pro HRMS or Journey Tracker, that your plan does not include. |
| Autopay | For monthly plans paid in India. Turn it on to renew every month without entering payment details again. Turn it off for a one-time payment with no automatic renewal. |
The Order summary shows what you pay today, including GST, and the next renewal estimate. Click the pay button and finish payment in the secure payment window. See Billing & Plan for current prices.
Note: Autopay is not available above a set monthly amount. In that case checkout switches to a one-time payment automatically.
Manage billing, autopay and invoices
- Click Account → Billing & Plan. The Billing & Subscriptions page opens.
- Current subscription shows your plan, whether autopay is on, your Purchased seats and active users, the Current period and the Next renewal estimate.
- Click Change Plan to move to another plan, or Renew plan to pay for the next period.
- If autopay is off, click Enable Autopay to set it up. You authorise a small payment so future monthly bills are collected automatically.
- Billing History lists every payment. Filter by All, Successful, Pending or Failed, or search by transaction ID or amount.
- Click Invoice on any row to download its PDF invoice.
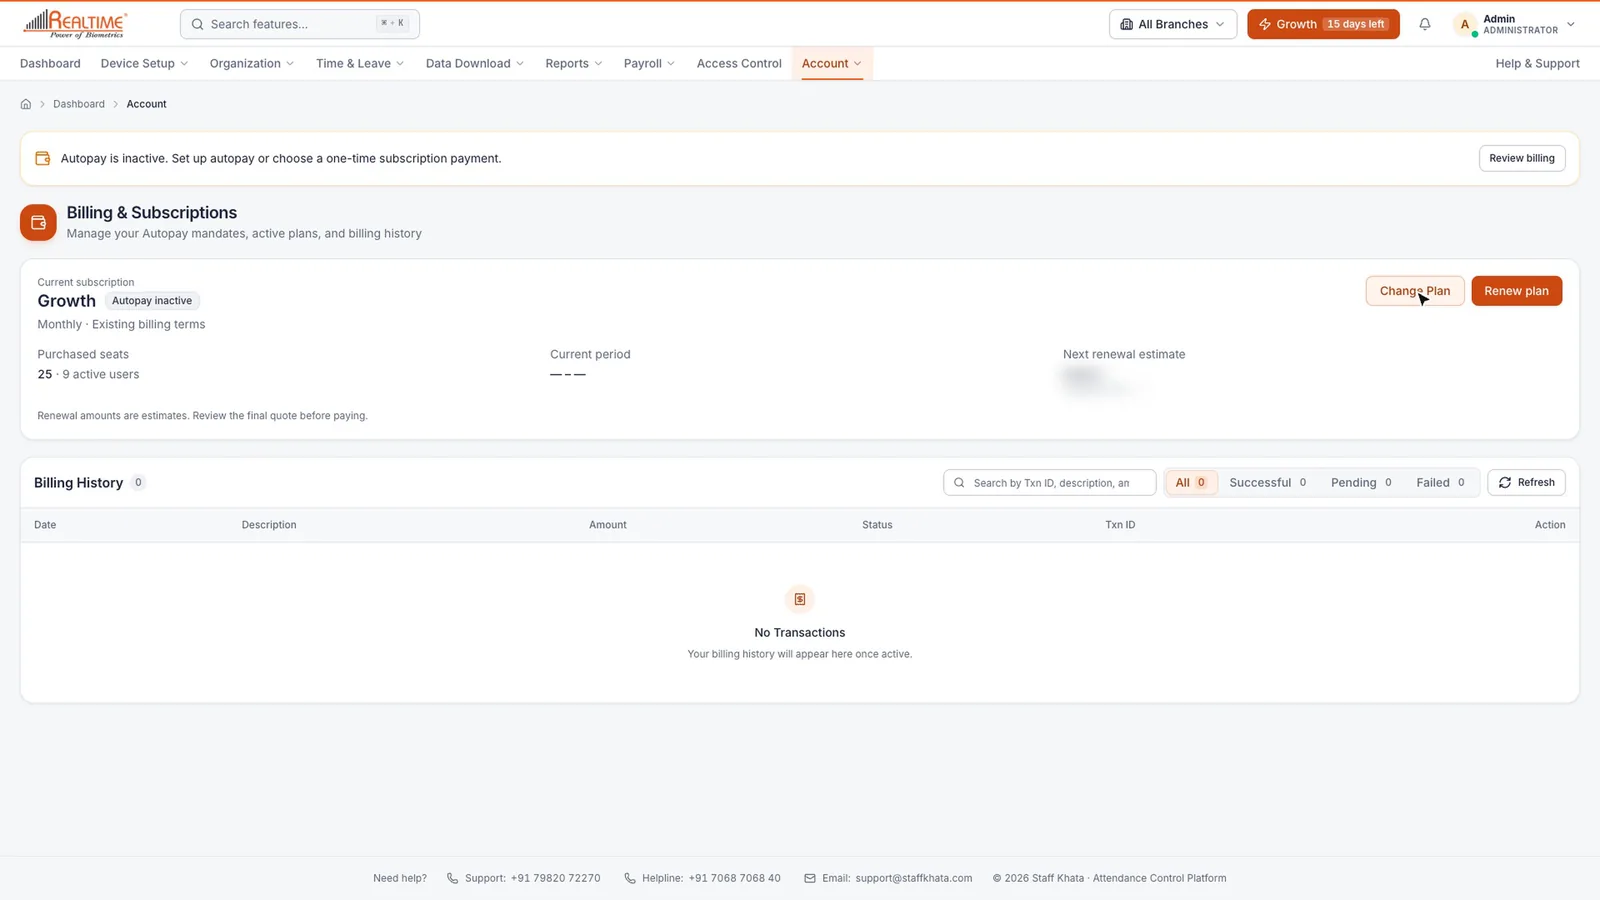
Tip: The Review billing button on the autopay banner at the top of your dashboard opens the same page.
If your subscription lapses, a Subscription Inactive message blocks the dashboard. Click Proceed to Payment to pay and restore access.
Get help and raise a ticket
- Click your profile picture and choose Help & Support, or click Help & Support at the right of the menu bar.
- Contact support at the top shows our support number, helpline and email.
- To raise a ticket, click Raise Ticket.
- Enter a Subject and describe the problem in Description.
- Under Attachments, you can add up to 5 files (JPG, PNG, PDF or DOCX, 2 MB each), such as a screenshot.
- Click Submit Ticket.
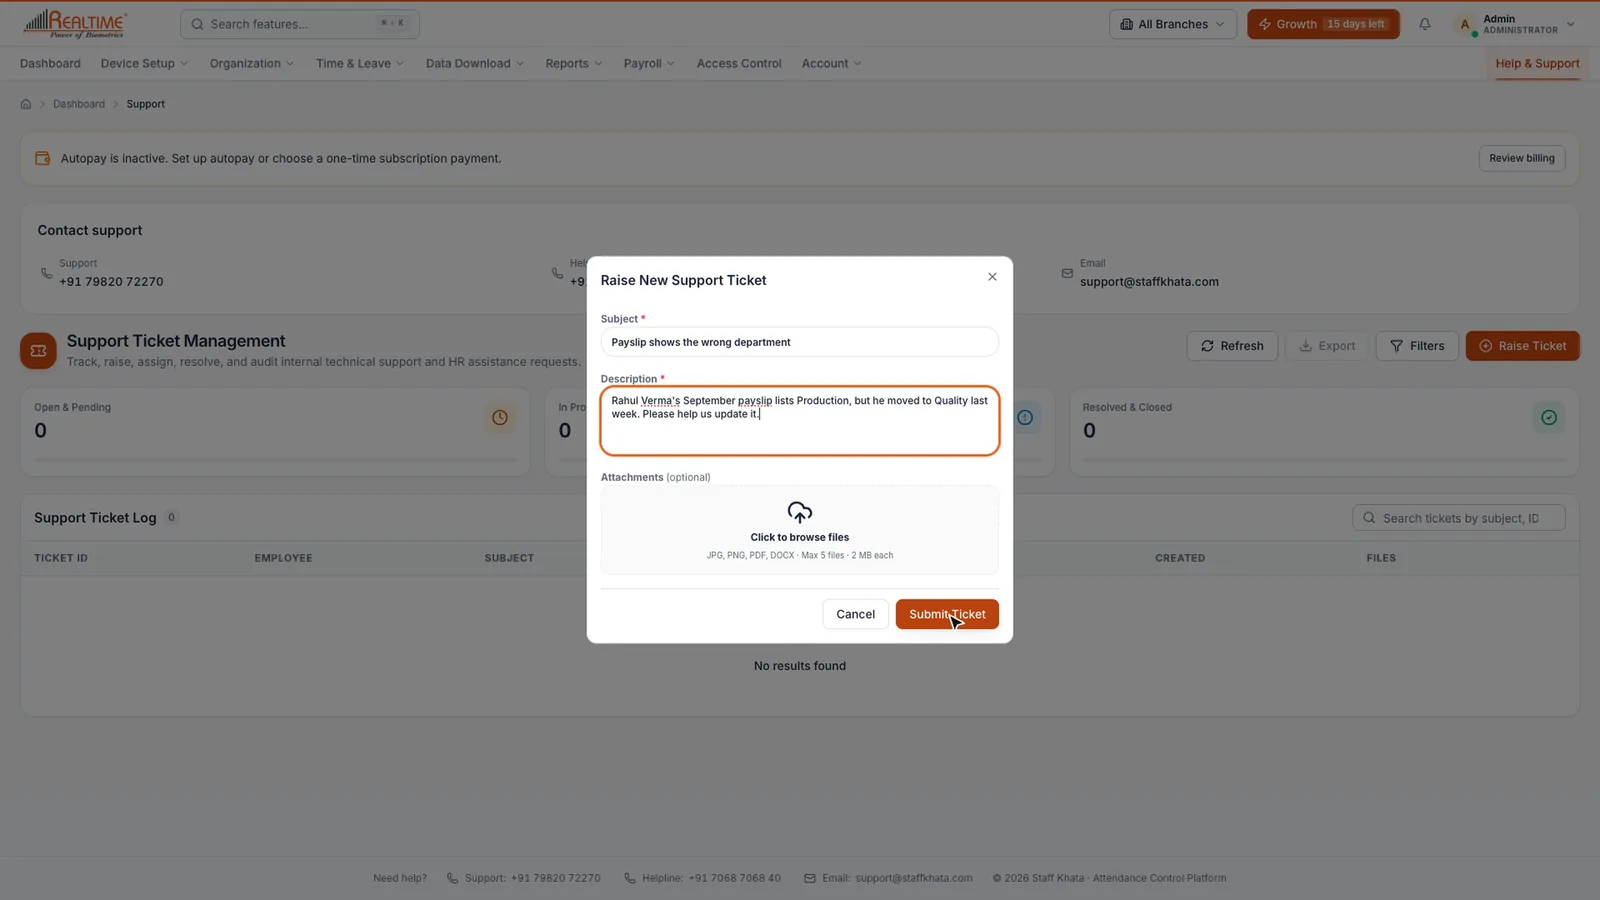
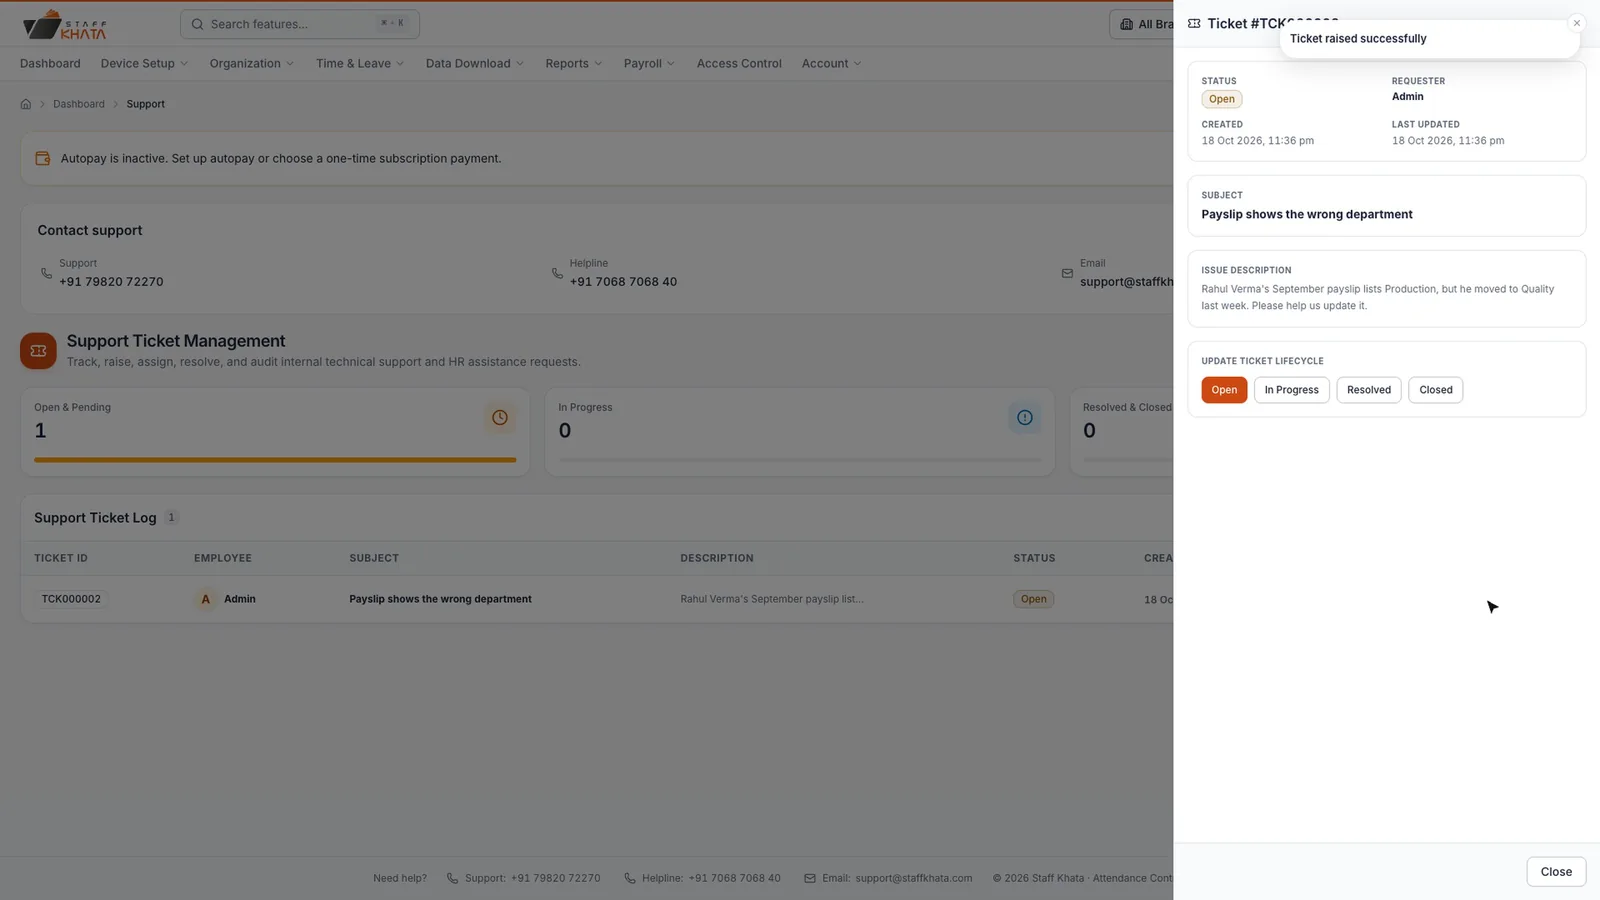
Your ticket is saved with a Ticket ID and appears in the Support Ticket Log. The cards at the top count tickets that are Open & Pending, In Progress and Resolved & Closed. Click a ticket to see its details and status, which moves from Open to In Progress, Resolved and Closed.
Note: Help & Support tickets are raised by the Admin or HR. Employees and managers should ask their company Admin for help first.
Still stuck? Raise a ticket from Help & Support inside the app, or contact us at staffkhata.com/contact.